PBM - Cheeseburger in Paradise
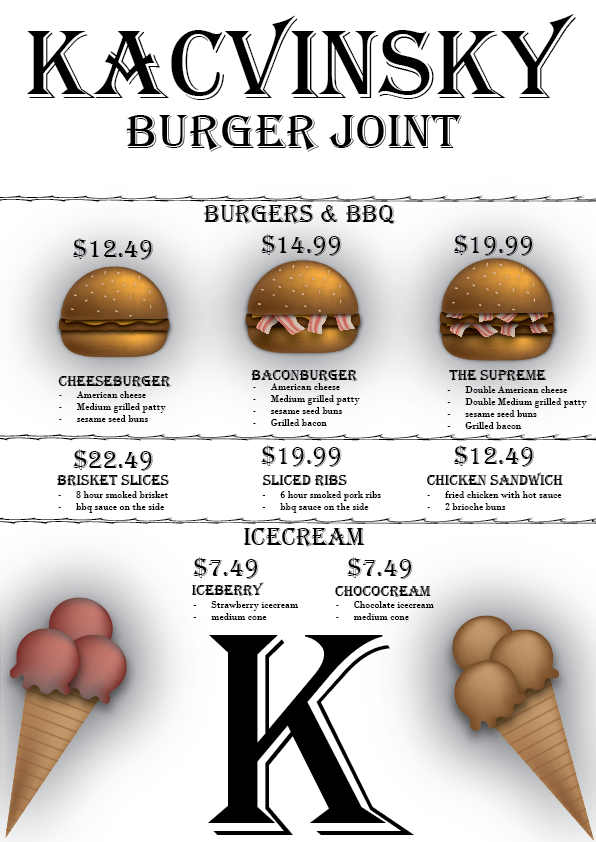
Since this was one of the last and most important projects of this third quarter, there was a lot for me to work on here. A project making me combine everything I've learned so far in Adobe Illustrator into one project. A restaurant menu. To start, I of course had to work on the most complicated item on the menu. the burger. I started with an oval that I would cut in half using the shape builder tool by adding in a rectangle, covering half of my oval with it, and completely removing my rectangle. I would be left with a single bun that I duplicated, flipped vertically, and shrunk. vertically to create my bottom bun. I also increased the height of my top bun. After finishing this, I was left with two blank buns I would have to add depth too. I wanted to make it look like both buns had a light source, So I used the mesh tool on my buns, then colored the mesh tool points a color that was a brighter and more saturated version of my buns' base color. The mesh tool highlights a certain area of a selected object with a chosen color based on auto-generated paths connecting to the outside paths of the shape. I also did the opposite to the opposite halves of my buns for a shadow effect. After finishing my two buns, I started work on the most important part of the burger. the patty. I added a brown rectangle, Smoothed its edges, and then added distortion to it using various distorting tools. I wanted to add some texture to my patty so I created multiple separate darker-colored meshes to put onto my patty. I also wanted to add depth to my patties so I decided to use the mesh tool to add shadow and light to my patty. After this, I began work on the cheese. All I did for my cheese was create a blob using the pen tool, adding a darker-colored mesh to it, and then group it up with a darker-colored clone of my cheese for an effect of thickness. All I had to do for my burger after this was add sesame seeds to it. So I put in an oval, removed two of its point anchors to give it corners, then duplicated it and used the shape builder tool to give it a darker side. Done with my sesame seed, all I had to do was duplicate and rotate it a bunch of times on my top bun. After this though, I still wanted to add more of a realistic effect of depth to my burger. I rearranged all of my objects in a stack of groups with the top bun on the front, the patty in the middle, and the bottom bun in the back. I also did this for a shadowy effect that I would add using a drop shadow for my top bun, cheese, patty, and bottom bun individually. I knew something was missing though so I chose to add a topping of bacon to my patty. I made a simple wavy shape using the pen tool, Made it a light pink color, duplicated it, made the duplicated shape a red color, made duplicates of my two shapes, combined the duplicates using the object builder tool, and then blended them all using the blend tool for a semi-realistic contrast between the fatty and meaty parts of the bacon. For me to add my bacon to my burger, I just duplicated my bacon, gave the duplicates a bit of variation, grouped my duplicates, and then arranged them below my top bun and over my patty and cheese. This was when I could start working on the menu itself. However I still wanted to add different variations of my burger; I duplicated my finished burger with bacon, then took the bacon out of the duplicate to create a plain cheeseburger. I also made a larger burger with double the bacon, cheese, and patties. Now that I was finally ready to start working on my menu, I added a white background to avoid transparency in all the blank spaces, Then started to work on the text with a title. My font of choice for my title was Algerian because I want my menu to be of a restaurant with a medieval theme. I named it "Kacvinsky Burger Joint" because "Kacvinsky" Feels like it goes with the theme well. I continued with adding in my Items, their prices, and their ingredients but where my ingredients have a Bodoni MT font because it goes well with Algerian and because Algerian is a caps-only font. To add more theming to my menu, I wanted to add cool-looking spacers. All I did here was place two thin lines next to each other, Group them, distort the group and duplicate my spacer to the appropriate spots. I also added a large "K" to the bottom because I felt as if there was too much blank space down there. To finish the whole project, I Had to add extra items that would accompany their respective spots on the menu. So I started work on making two ice cream meshes both next to the "Iceberry" and "Chococream" items on the menu. I began with my scoops by putting in an ellipsoid with no stroke, adding a separate mesh using the pen tool onto my ellipsoid, combining, combining them using the shape builder tool, coloring them brown and pink for both ice cream flavors, then giving my scoops depth using the mesh tool blending the original colors of my scoops with lighter colors. Before working on the cone itself, I duplicated my scoops, gave them drop shadows, then stacked them all together. All I had left was to work on my cones. I added an elongated triangle and used the mesh tool on it, however, I noticed a great lack of texture on my cone. To solve this problem, I decided to add a simple pattern to my cone. I put in a thin brown line, gave it an array, put it onto my cone, and then used the shape builder tool to remove the extruding parts of my lines. To finally finish everything, I duplicated my cone for my chocolate and strawberry Icecream scoops, aligned them correctly, then finally arranged them to be in the back(behind my scoops), to give an effect of the Icecream drooping over my cones.
PBM - Rough Character Sketch Project
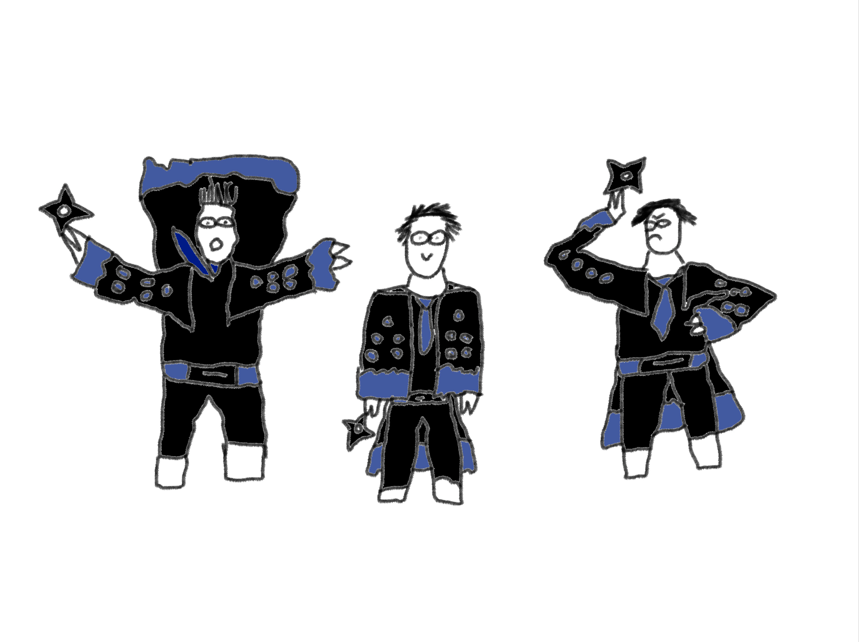
In this project, I was tasked with coming up with my character. this is Hanza the ninja. The three drawings of him shown above are one where is is falling on the left, one where he is stationary in the middle, and one where he is throwing his shuriken on the right. Hanza was born in a hidden village of ninjas. In a great era of war. As he grew up, he was forced to serve in many battles due to the hostility of this era. As he grew up though, he started gaining immense power as a ninja, to the point where he overthrew the government of this hidden village with a rebellion. He wanted to change the state of the hostile nation, so he worked on making peace with the nations that the overthrown nation went to war with. The people of Hanza's village supported this and elected him as the leader of their village. Hence why he wears a robe and a tie that are both blue to represent his want for peacefulness and stability. Although his shuriken may seem like this isn't true, it's just there for self-defense reasons.
PBM - Lit & Cameras 4 corners
PBM - Design Matrix Challenge
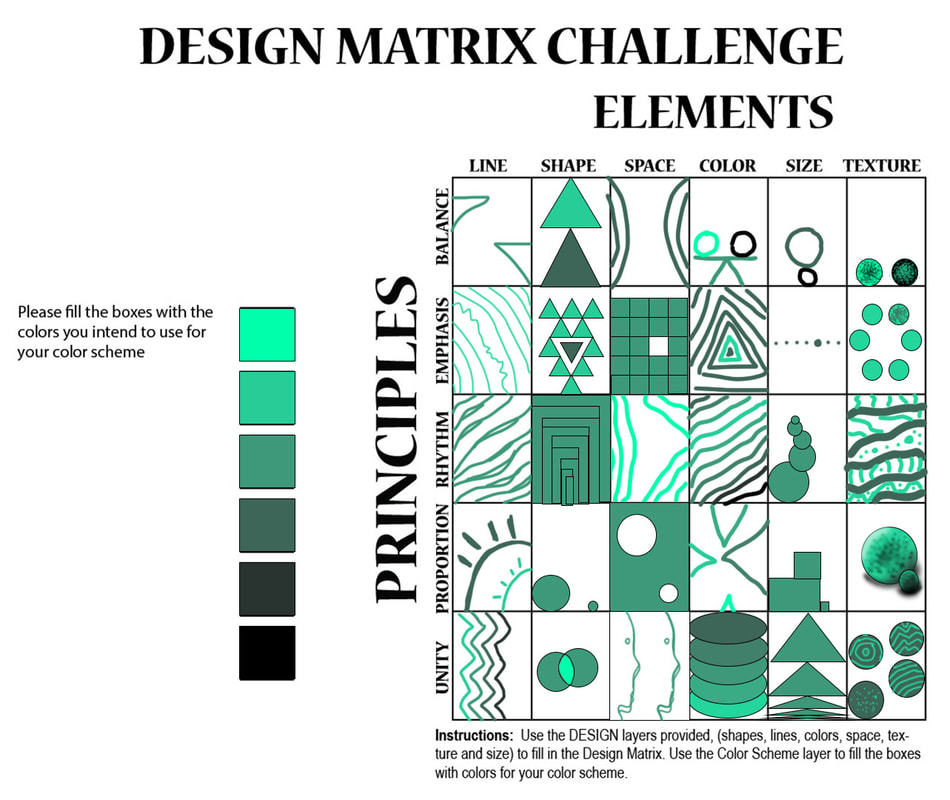
This was probably one of the most time-consuming assignments that I've had to work on so far. Having to create 30 designs all specifically different from each other with a low set of requirements was certainly difficult, however, I managed to push through it to the point where I've been educated well on the principles and elements of design from this assignment. To start off, the first design that I worked on was the line+balance design. I chose a very simple design of two line-drawn cliffs aside from each other that show the principle of balance due to their opposition. For the rest of the balance designs, I would create two symmetrical balances on each other for the shape one. For the space one, I would create multiple lines forming a symmetrical image separated by space. For the color one, I created two different colored balls balancing on a seesaw formed from 3 lines. For size, I created one large ball balancing on a smaller one. For texture, I created two identical balls with a texture but where the second one's texture color and color were the first one's but swapped. Now for the emphasis designs, I started with the line emphasis design where I drew a set of equal lines disrupted by a single very disrupted line. For shape, I created a large set of triangles all next to each other disrupted by a triangle in the center turned the other way around. For space, I created a plot of squares with one missing, emphasizing the missing square. For color, I created a set of dark-colored lines overlapping each other disrupted by a light colored one. For size, I created a series of small dots repeating each other disrupted by a larger one. For texture, I created a group of circles around a certain point disrupted by a circle with a unique texture. To start off the rhythm designs, I started off with the line one drawn as a simple series of waves repeating each other. For shape, I created many overlapping rectangles creating a rhythm like pattern. For space, I created another group of waves but separated by space in the center. For color, I created yet another series of lines where the color of each of the repeating lines would increase in brightness. For size, I created a group of connected circles decreasing in size after each connection. For texture, I created 5 designs with a specific texture each separated by wavy lines. Now for the proportion designs. With the line design, I created two suns, one small one and one big one where the big one would overlap the small one. For shape, I created two circles of drastically different sizes on the opposite ends of the design. For space, I created a rectangle covering the whole space of the design, then I removed parts of the rectangle in the shapes of circles, emphasizing the lack of space in the form of circles. For color, I created 4 pyramids increasing in brightness and size on each side of the design space. For size, I created a group of rectangles stacked together, and for texture, I created two 3d looking ellipses of different sizes then added a texture onto each of them to add more of a sense of realism. For the last principle, unity, I started off with the line design, where I would create a series of unified lines of a unique shape all next to each other. For shape, I created two dark-colored circles overlapping each other to form a brighter color in the middle. For space, I created two faces next to each other, using space to emphasize an overlap because of their 2.5D look. For color, I created a group of tabloids all overlapping each other and changing in brightness with each overlap. For size, I created a large group of triangles exponentially decreasing in size as they multiply. Lastly, for the texture+unity design, I created 4 circles next to each other, all having their own unique design. To end everything off, this assignment has certainly taken me lots of time to complete, and has made me do lots of revisions; however, because of all the difficulties, I am now much more skilled with things such as this.
PBM - Animated 4 corners (WIP)
PBM - 4 corners
(WIP)
PBM - Masking
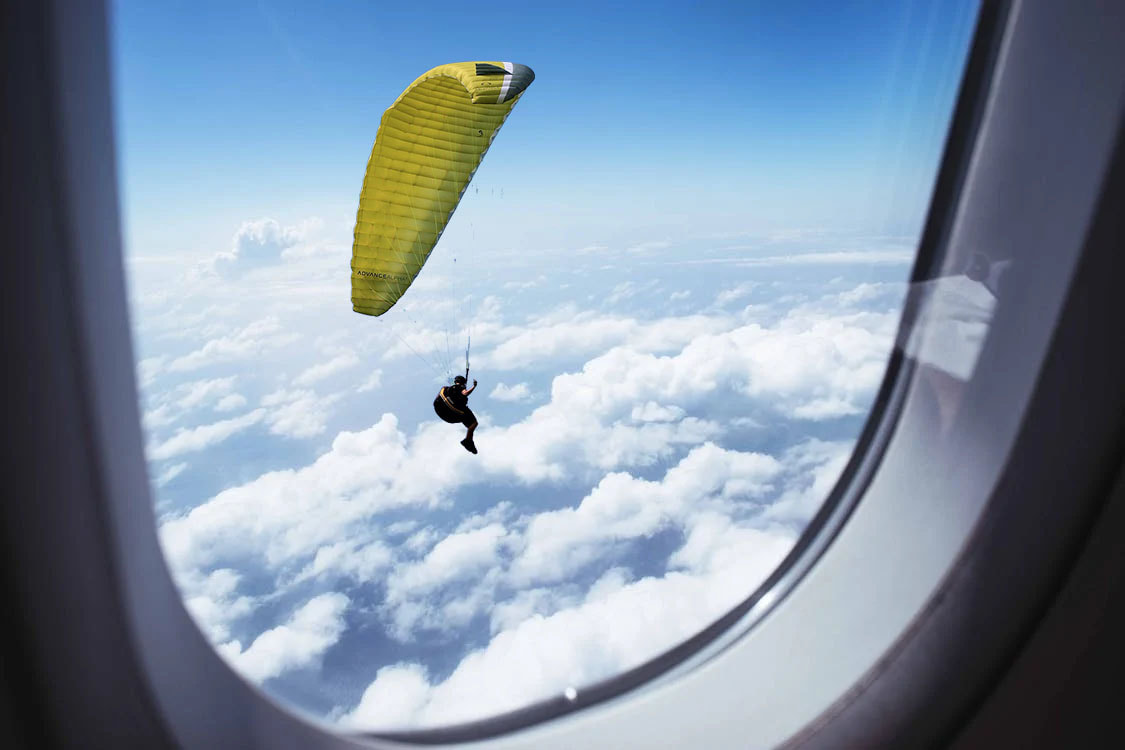
In this assignment, I had to create an image with a masked layer on a background, where each layer has to be royalty-free, Because of this, it took me a long time to figure out what images to use in this project. In fact, trying to find two images that would match was the most time-consuming part of this project. Although from this, my skill with finding the correct images to put together has increased. When I added my two images, (one being the view out of the airplane and the other being the paraglider), it was easy for me to remove the background of my para-glider, all I had to do was select the part of the image that wasn't him, invert the selection, and then delete. Lastly, all I had to do was scale the image of the paraglider correctly to keep it from looking unrealistic. To finish off, I don't believe that I learned too much from this project, but I do believe that my level of skill has increased from it.
PBM - Vignette

This project definitely improved my skill and competence with photoshop. What I learned to do for this assignment was to use the feather option using the marquee/lasso tools for a vignette style. I started on this project with a JPG of a landscape, then adding a separate JPG of a sheep. The reason why I chose this set of images for this vignette assignment is because I found a comedic element in the idea of a sheep having its own vignette image of a zoom-in on itself on the landscape that it's on. After I added these two images, I removed the background of the sheep by outlining the sheep's head using the lasso tool, inverting the selection, then removing the inverted area with the feather set to 15 pixels. What this does is it blends the non-deleted part of the layer with the layers behind it based on what the feather is set to. where the more pixels it's set to, the larger the blending area is. Lastly, I set the fill of the layer to around 80% to give it a full vignette effect. The fill option makes it so that the selected layer 's pixels blend with the pixels of the layers behind said layer. giving the selected layer an almost ghost like appearance. An appearance needed to make the vignette image look complete. While completing this may have sounded easy, It wasn't for me. This is because at the time of making this, I was still brand new to photoshop causing me to make many mistakes on my way through. But since mistakes make you stronger, this assignment certainly helped me with my lacking resourcefulness in photoshop.
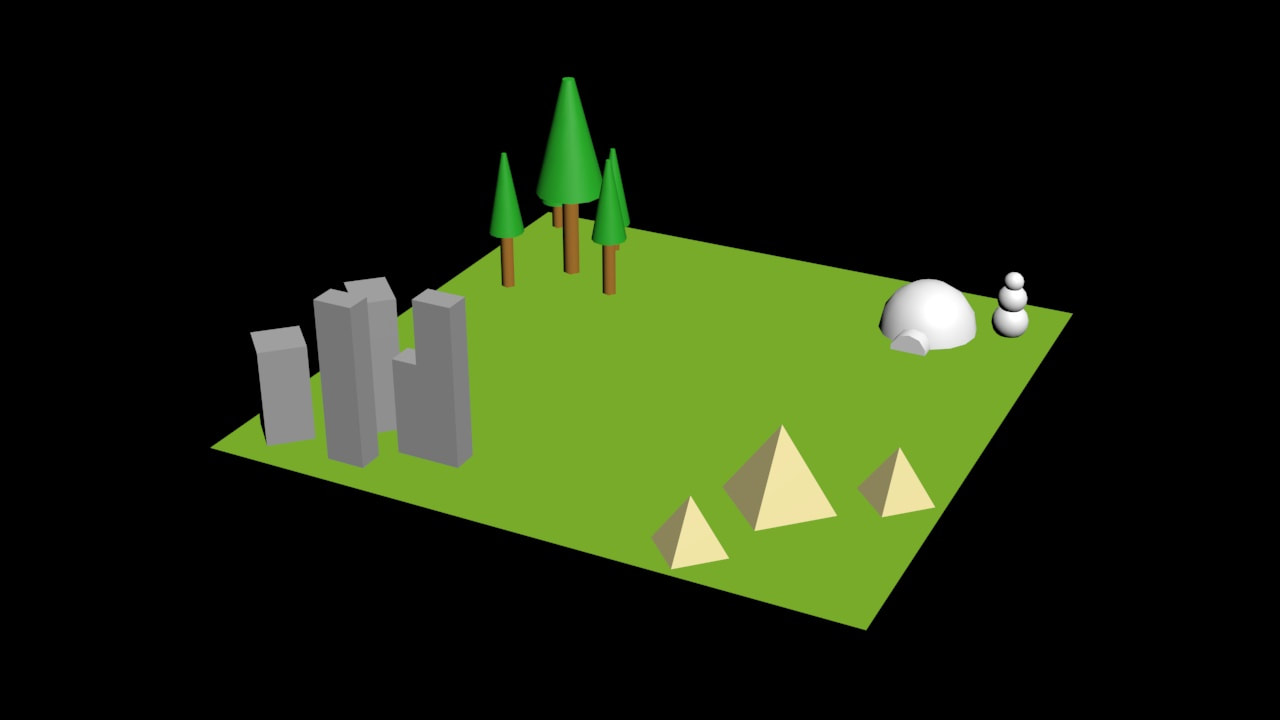
PBM - Basic Modeling
I began this project by
