|
Before working on this project, I had to create the script, as the script is the backbone to a video. As everything In my movie trailer is in the script, (and since the script wouldn't fit very well in this text), the script is right under in the PDF you see below this text. Working on the script was quite fun but was quite a time consuming part of the production, As it takes some time to brainstorm and come up with new ideas for the script.(WIP)
0 Comments
This was certainly the most complex thing I've made in premiere pro so far. Even though I've had the most fun making it. The constraints were to make a 20 second video of a man leaving his house; implementing the 180* rule where the scene cuts to a shot of the same target but the opposite side of the target. Basically, It's used as a way to make clean cuts look good in film. I had to edit this video using a selection of audio and video clips that I would have to cut and place correctly for optimal pacing and audio that matches up with video. Now, one would ask: "Well, if you have all the audio and video clips, couldn't you just place them together and match them up correctly?" Well, it's not that simple. In order to cut from shot to shot in a single scene, sometimes multiple clips must be recorded for reasons such as limited equipment, and unwanted cameras in a shot. In fact, sometimes actors have to act through one scene multiple times because 1: Editor's convenience, and 2: Audio. This is where L-Cutting comes in. An example of L-Cutting in this case is cutting and arranging multiple clips for a single scene to match with the scene's audio. This is to prevent hearable cutting in the audio of the scene which is unwanted when it comes to audio editing, unlike video editing. I used L-Cutting for the longest scene in my video that required multiple shots, giving me a clean and movie-like result with the video perfectly matching up with the audio. In professional film, microphones are usually separate from the cameras meaning that movie editors have to correctly match up one (sometimes more) audio clip(s) with multiple video clips for a complete scene with cuts. Like everything I've done so far in PR, I loved working with video and audio clips. I did have one problem making this video though. Trying to get it to a 20 second runtime from 27 seconds. So I used the power of a jump shot at the last clip Of him going back in his house to get it to exactly 20 seconds. Jump shots are when a part of a scene is completely cut out and filled in with what was right to it as a way to save time or put emphasis on time passing by.
This project in illustrator was very similar to the previous one, but where I would have to organize video clips into a video instead of multiple images. I also added transparency to my title for a more professional look. Because of the slow pacing of the video, I chose to add crossfades to each of my video clips to help with the slow pacing. The use of video clips rather than images here was no problem for me as there was no action for me to focus on in each of my video clips. Just like last time, there was nothing much difficult when making this video, As everything was quick, easy, and fun to do. Although this project was very similar to my last one, there was one extra thing that I decided to work on. sound effects. So I imported multiple sound effects relevant to each of my video clips then cut them up to fit with each one. I made each ambient sound a little bit quieter so that they would be more in the background, then transformed my audio clips into J-Cuts and gave them exponential fades so that they would blend in better with each other. J cuts are when an audio clip that is supposed to be with a video clip starts before its respective video clip does. This is usually to add suspense in things like action scenes in movies, though I thought it sounded nice here.
As my first assignment in premiere pro, this was surprisingly easy to make. All I had to do was organize a bunch of images into a video clip of 15 seconds with audio playing. I started with gathering my images relevant to the theme of blue on a royalty free image website by downloading them and putting them into my project panel. My project panel is where I can locate and store files to use for my project just by dragging them onto my media player, which is what I did. Making some of the images stay longer on the audio clip than others to keep my finished project from feeling flat. Since my video had to be 15 seconds, I cut a part of my final clip off to fit that constraint. To complete this project, I had to add a title appearing at the start of the video. So I used my type tool to create a new clip of text that read "Blue" to last for the first few images. I layered It on top of my main layer with my blue themed clips so that it would appear. Finished with this, I still felt as though my video was incomplete. To fix this problem, I Polished things up by adding exponential fade effects to my clips so that the video would start and end more smoothly, then added a royalty free audio clip that would cut at the 15 second mark. What I found the most easy was organizing my files to be transferred to the media player. To finish, I find that there was nothing difficult about starting on premiere pro as it is very well designed, easy to work with, and I'm excited to use it more.
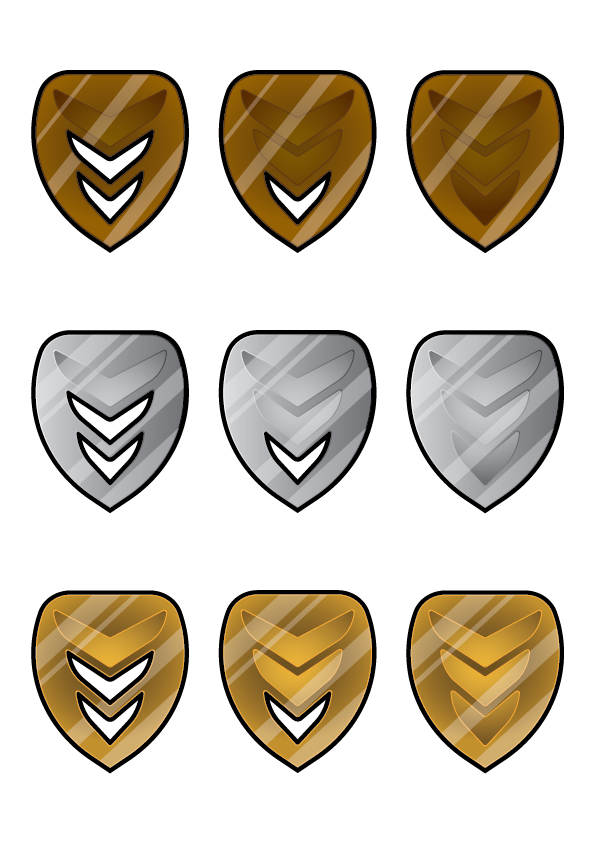 This is a project of mine that has enhanced my skills and creativity in AI. It taught me how to come up with creative designs and I got better at using many tools because of it. To start making the badges, I created a brown badge-like shape using the pen tool and then adjusted it using the direct selection tool. After this, I added a shine to the object using the gradient tool to create a bronze look to my shape. After this, I started working on the rank part of my badge, where the more filled-in holes there are, the greater the rank based on the tier. The three tiers are bronze, silver, and gold. To do this, I used the pen tool to design three shapes that would go onto my badge. I wanted to add a different shine effect to them to make them stand out so I duplicated my badge, gave it a thick black outline, and then used the object builder tool to subtract my 3 shapes from my original badge that I gave a brown outline to. What this does is it gives the effect that the shapes on the badge are extruding from the badge even though they're not in Illustrator. I wanted to add another reflection effect to my badges, So I added a group of 50% transparency rectangles to my badge that I would delete the unwanted edges using the shape builder tool. Done with my third rank badge, I started work on my first and third rank badge by duplicating my badge, using the shape builder tool to remove the unwanted part of my badge, and repeating this process once more. I stacked my 3 badges next to each other, duplicated them twice, recolored my two new rows of badges silver and gold, and then finished everything off by adding in new transparent rectangles for a look of reflection.
This was a very helpful practice project that has made me much better at using the array and pen tools. I had to trace on a pixelated background of Star Wars designs and fill them in with the pen tool. I started with the logo you see in the top right with the "st", Switching from curved lines to straight lines using the pen tool with these movable widgets that would dictate the path of the bezier curve (mathematical paths formed by the location of different points. the anchors, and the widgets. How the curved paths are placed is that for each anchor point on a curved path, there are two widgets parallel and of equal distance to the anchor point. However, this can be altered by holding the alt key and changing the location of the second widget point. With this knowledge of how the pen tool works, I would go on to complete tracing all of the shapes you see above. As I said earlier, I also used the radial array tool to quickly make all of the symmetrical shapes you see up above, Such as the 2nd one with sextuple symmetry, the fifth one with octuple symmetry, then the 3d, 4th, and 5th all with double symmetry. I did this by making a unique part of the drawing, and then duplicating it using the radial array tool based on its type of symmetry.
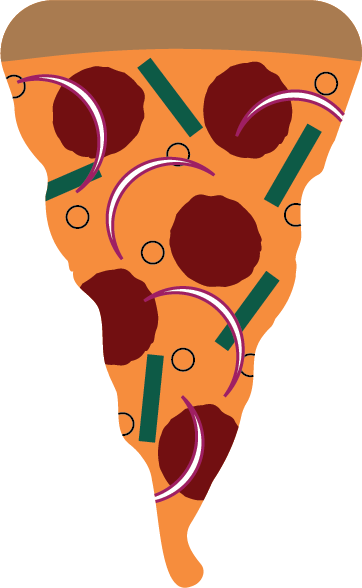 In this project, I was tasked with using new software that I hadn't used before. Working with it was very fun, quick, easy, and pleasant, This is mainly because of the way illustrator works. Where when working on illustrator, you're using the power of mathematically generated splines instead of pixels in photoshop. Although the image that you see above is a bitmap image, The spline painting process is still very important as it makes illustrators a very powerful tool. I started with adding an elongated triangle to my canvas, then coloring it using a color from the vegetable swatch that I would later use for my toppings. To add the crust, I put in a rectangle on the top of my triangle colored appropriately, then used the shape builder tool to remove the access crust, and lastly used the direct selection tool to smooth my crust out. After this, I felt as if the cheese itself was lacking, so I used the wrinkle tool on the cheese to give it a melting effect. After completing the base to the pizza, I started working on the toppings with the pepperoni. To add more depth to the image I used the warp tool again with a dark red circle that I would duplicate as my pepperonis. Since I had some sticking outside of the cheese, I had to use my shape builder tool again to remove the parts of the ones that were sticking out. I repeated this twice more with my olives and green onions, but I would do this on the stroke of the olives instead of the fill. To add a final topping, I chose to add red onions that I would make by adding in a white circle with a purple stroke, removing a part of it using another circle with the shape builder tool, Then finally duplicating my onion to complete my pizza.
This was the most challenging yet fun 3d model I've worked on so far. I'm pleasantly surprised with the finished project and I'm happy with how far I've made it in this class. To provide some history that led up to the start of this project, All of the files on the computer that I use were wiped away. Meaning that I had to start over on my tank model completely. Although this was a setback, The tank model that I came up with ended up being much better than my old deleted one. To start the UV mapping, I went into 3ds max and added an unwrap UVW modifier to my tank. When I peeled my tank, I noticed the great number of spaces that I would have to draw/fill in while in Photoshop, To minimize the amount of editing that I would have to do in Photoshop, Removed half of my tank using the edit poly modifier, then added the symmetry modifier on top of my unwrap UVW modifier, what this does is it lets me edit only half of the tank in photoshop with the symmetry modifier takes care of the other half. While inside the UV editor, I noticed a great image distortion in my tank model. To fix this, I the tools in the unwrap UVW modifier to create new parts, after a lot of seeming, I noticed a great decrease in distortion that would allow me to start work in Photoshop, however, To make editing in Photoshop even easier for me, I would have to create seems around areas that would be painted differently from others, Such as the continuous track and the area with the wheels. after quite a bit more seeming, I was fully ready to work in Photoshop. I first rendered my UVW template in 3ds max as a jpeg, then embedded it into Photoshop as a separate layer over a square image of tank camo because my UVW template is a square. Since my UVW template isn't an image with a transparent background, I had to remove the black in it So I could only see the lines over my camo in Photoshop. I did this by selecting one of the black tiles using the magic wand tool, clicking select similar, then deleted as I wouldn't need this black background anymore. To start with adding things to my camo canvas, I added a US Army star that I would rescale and remove the background to an area of my project on Photoshop that I could see thanks to my edited rendered UVW template. After this I started working on the wheel portion of my tank by Importing an image of a tank, rescaling it to match up with the correct part of my image, turning off the visibility of my tank image layer, then using the polygon lasso tool, inverting my selection, deleting my inverted selection, then turning on visibility So that my edited tank image layer wouldn't invade into other parts of my image. Lastly, I started to work on my continuous track. I wanted sort of a dirt-like look for them so I Painted the correct parts of my image a brown color then added a darker color of brown to them using a textured brush. I wasn't finished though as I had to keep my painted dirt from invading the incorrect parts of my image. So I added a layer mask to my dirt layer and then added white sections to the invaded areas using the polygon lasso tool. (note: The UVW map that you see above actually isn't the one that I used for my tank. It's just there to show the painted areas of the tank. When finishing my image in Photoshop, I removed my edited rendered UVW template from my image as if kept it for my tank, all the edges would be painted an ugly yellow). All I had to do now was go back into 3ds max, open the slate material editor, add in a standard legacy block with my image as a bitmap connected to the block's diffuse color, and then connect my standard legacy block to my tank model. After this, when I rendered my tank image, I noticed a lack of depth. So I imported a square image of just rust into Photoshop, turning on a black and white filter, then saving and importing it as a bitmap for the bump setting of my standard legacy block, finishing this assignment.
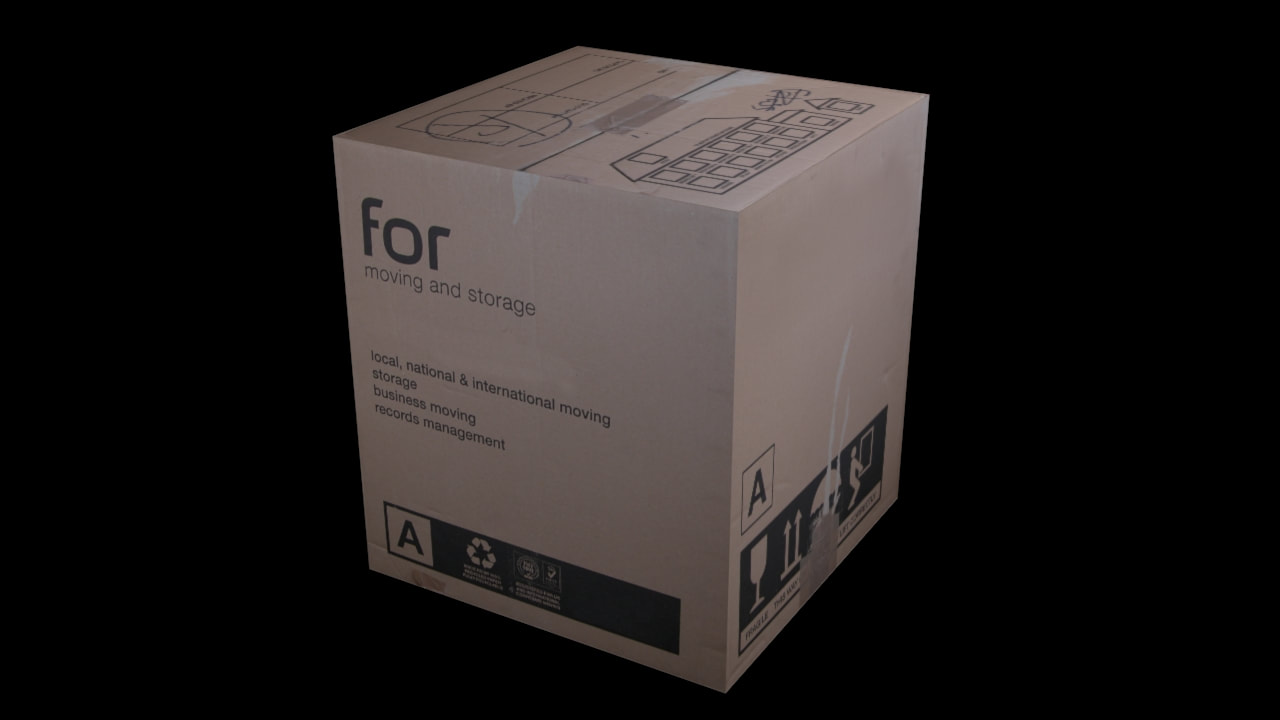
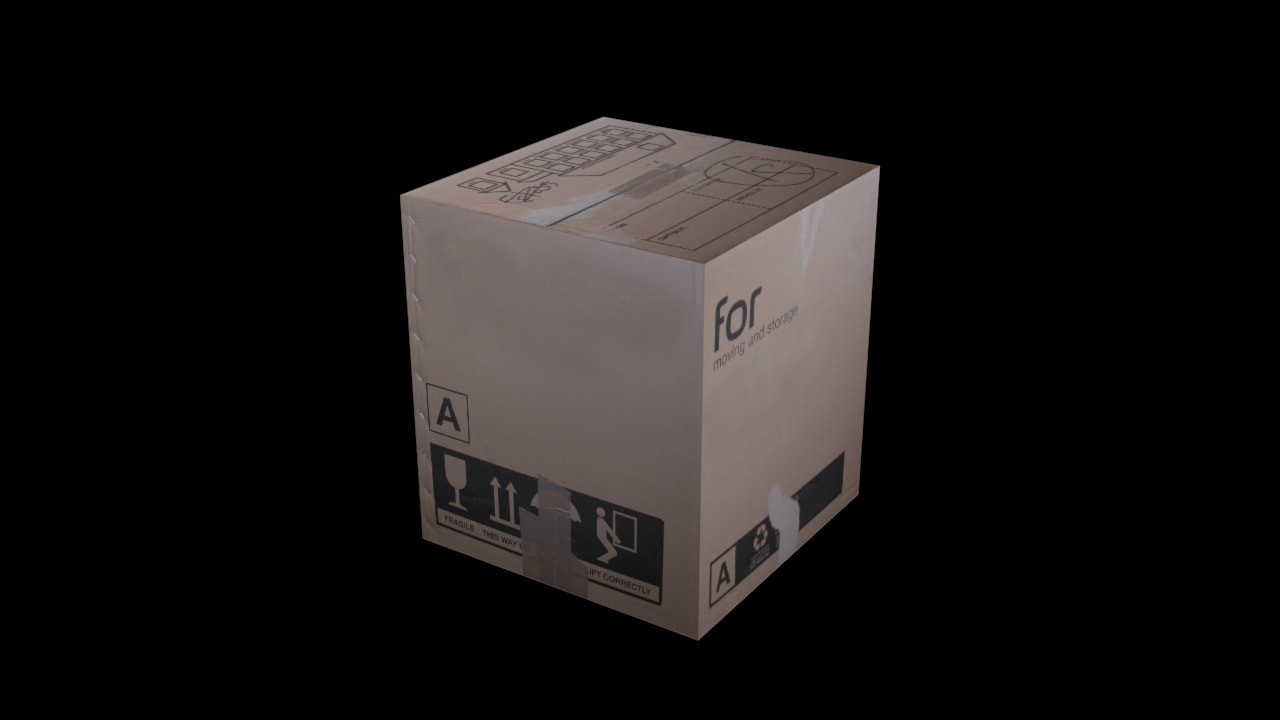
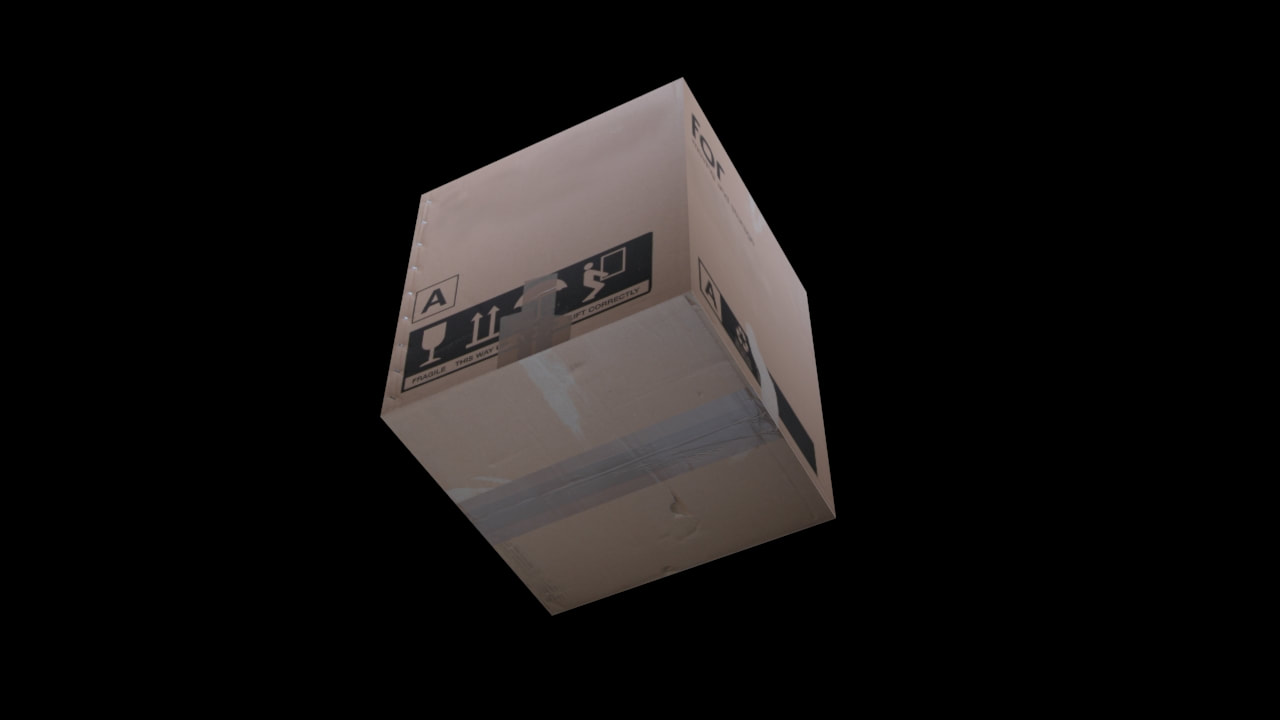
This assignment was quite easy to complete, however I did learn quite a bit from it. I started by adding a cuboid, adding two modifiers to it, (UVW unwrap & edit poly), and then compressing the modifiers as an edit poly modifier to add images to the sides of the cuboid. Then to start with actually adding the images to the cuboid, I downloaded 6 images to put on the box, then opened to slate material editor, added a multi sub object block with 6 inputs, each input labeled correctly to avoid incorrect mappings, then added 6 standard legacy materials to each of the 6 inputs that I would then connect my 6 downloaded images to as bitmaps, each bitmap image correctly connected to the right standard block. But not completely. even though each of the sides' names matched up, the sides themselves didn't. To fix this efficiently, I used my editable poly modifier to change the material IDs of each side so that they would match. I could match these quickly by clicking on the unmatched side with the polygon selection for it to tell me its ID, then changing the ID with the correct one twice to finish this project. To conclude, I learned how compressing a modifier works, and how to change unmatched sides quickly.
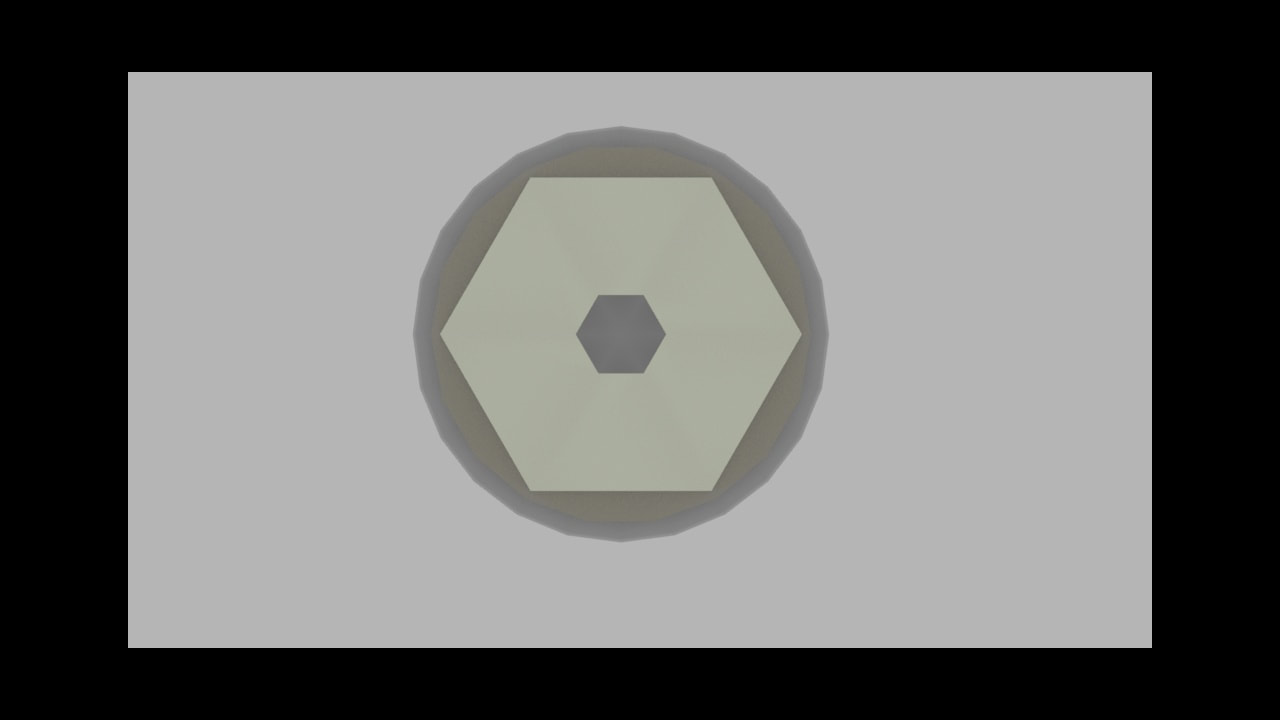
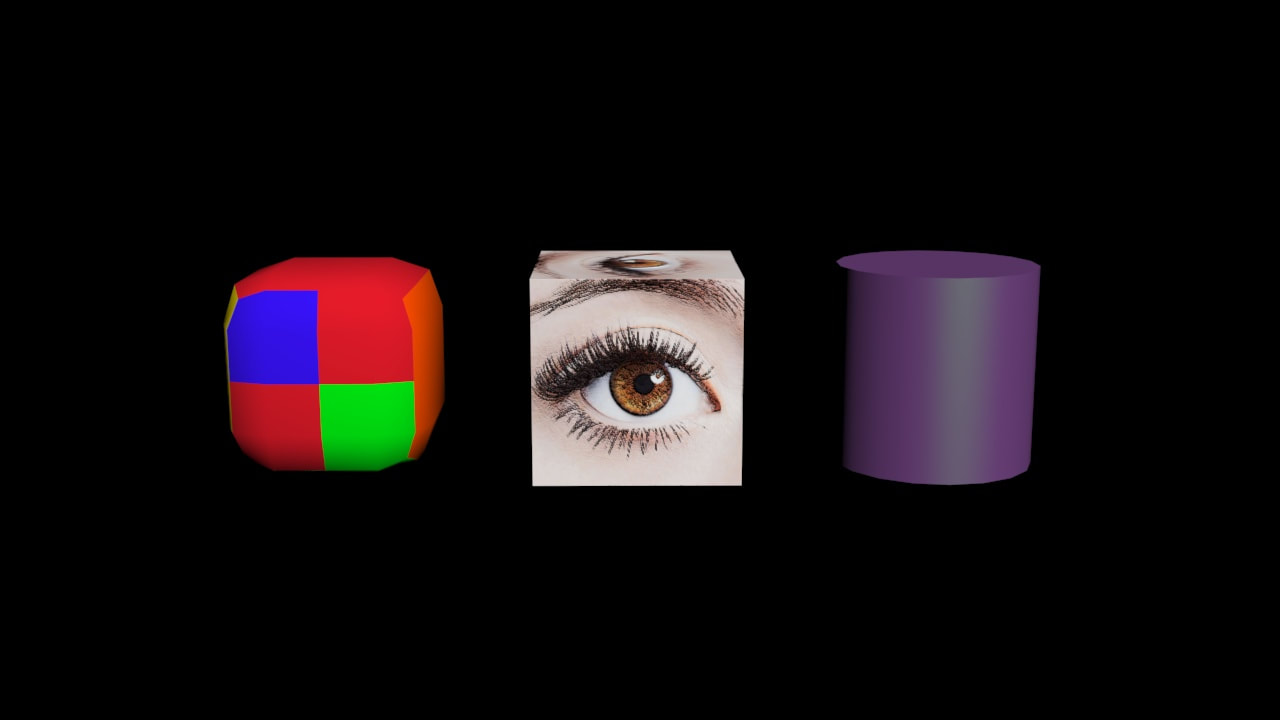 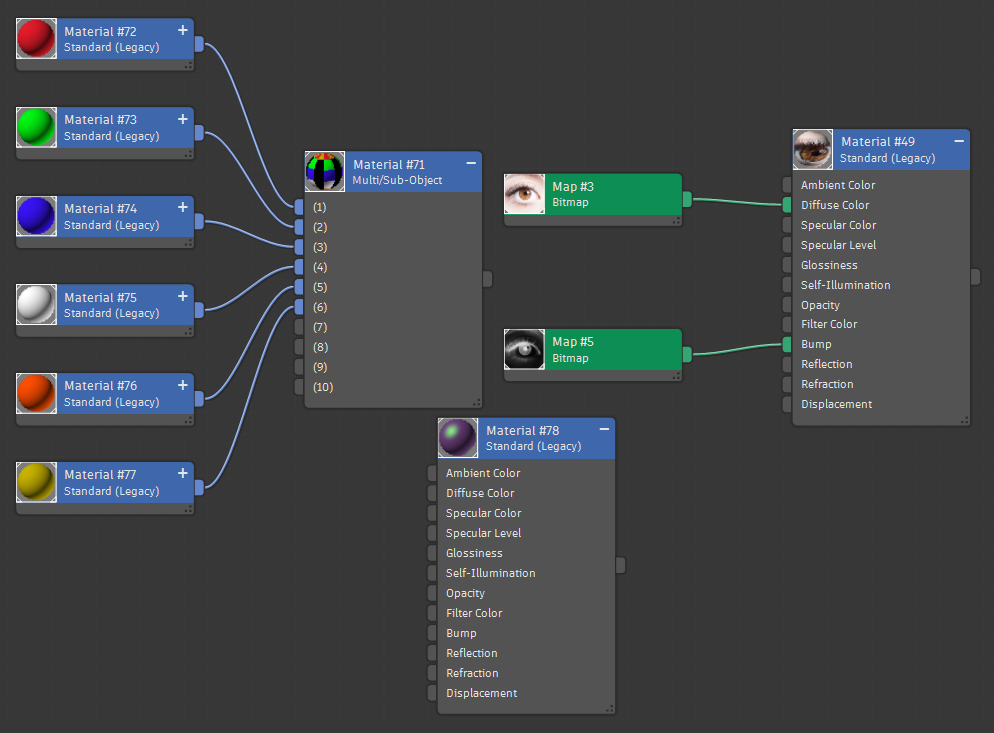 During the creation of this, I learned how to map materials, textures, and images onto objects. First off, I started with the cylinder on the right by adding the cylinder standard primitive, then opening up the material editor then adding a standard block to the editor that I can use to change the material of the cylinder. The first thing I altered was the diffuse color of the cylinder using the material editor. Something that I could do without the editor, However, I would need to do this to add a specular color. The specular color adds a light source to the selected object. I colored the specular color the complementary color of the diffuse color because I thought that It added more depth to the cylinder. After finishing the cylinder, I started working on the eye cube in the middle. Again, I added a standard scanline block with the material editor for this object. But then added more to the block itself. I added a bitmap image that I cropped as a square JPEG in Photoshop. Then it is the diffuse color connector to map the square image on each of the 6 sides of the cube. I wasn't done here though. I had to add an actual texture to the image, which means a bump map. Now the way bump maps for standard scanline cubes work is that they map onto the cube-like images used for the diffuse color, but where the parts of the image that are lighter shades of gray Bump out more and vice-versa. So I took my cropped eye image in Photoshop, added the black and white modifier to it, and then inverted the image because I noticed that when non-inverted, the parts that would realistically stick out the most were black. which is the opposite of what I wanted. For my final cube object, I added a multi-sub-object block for it instead of a standard one. This is because multi sub-objects let you color multiple of their sides. After this, I converted the object to an editable poly, with four sections on each side that I could color. I started to work on coloring this object by adding 6 standard legacy blocks to connect to 6 connectors on the multi-sub-object block that covers the six sides of my cube. Lastly, after coloring 6 of the sides, I recolored some of the 4 plains per each side with the other colors using the edit poly modifier, and then I was finished. This was very fun to make as the material slate editor is a very well-made tool.
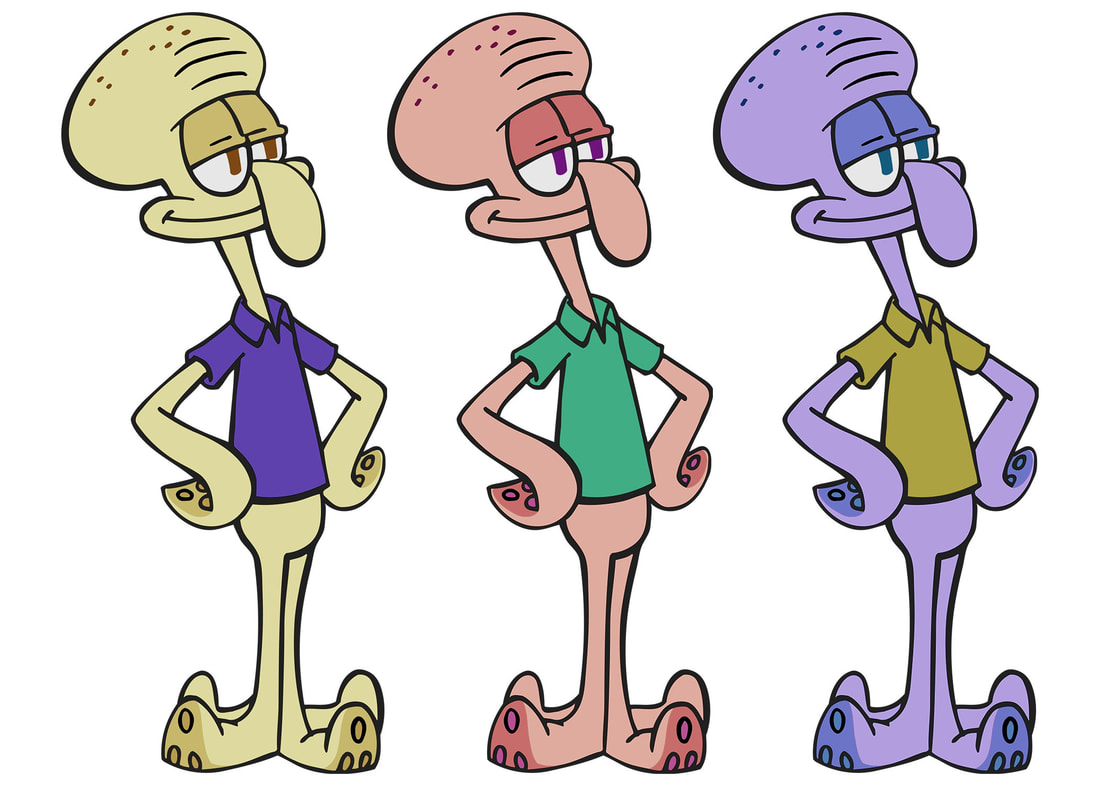 This is the Photoshop project of mine that I am the most proud of, As I am delighted with its final result. The character that I used for this project is Squidward. I chose Squidward because I thought he would go great with my choice of colors for each image. What I did to start was place an image of Squidward, remove its background by clicking on the background of the layer, invert the selection, and then mask. I duplicated this layer three times, grouped them, and then added a black and white filter to the mask to remove the color of each layer so that I could re-add a specific selection of colors to each one. What I did for the colors was I went into Adobe Color Wheel and then saved 3 analogous color palettes for the libraries tab of my Photoshop window for each Squidward. These 3 analogous color palates are at 0 degrees, 90 degrees, and 180 degrees on the RGB color wheel that Adobe Color uses. For my first squidward, i used my first selection of 5 colors from my library where the second color is for his skin, the third color is for his hand, leg, and eyelid skin, the first color is for his Cephalopod limbs, and the fourth color is for his skin bumps and pupils. What I did for this was I added a new layer for each squidward outside of the group, used the magic wand tool to select the areas that I wanted to color, then selected the layer for the squidward that i was coloring, then used the paint bucket tool to fill in the selected areas with the selected color in the palate of colors for the squidward that I was painting. To complete this, I repeated this two more times using my 2 other color palettes for my 2 remaining squidwards. I still had more to do. I noticed that the colors were looking a little bit off and too vibrant so I added a soft Light filter to each layer of color that I had, which made everything look so much better. Being finished with this, it's safe to say that I'm satisfied with what I've made and I'm happy that I'm improving, especially with my skill and knowledge on color theory.
This assignment has boosted my skill in identifying the hues and saturation of colors and has also boosted my understanding of color theory. With the first game that I played, I had to pick the right color on a color wheel that would show up on the center of my screen under a timer being the color of the color that I had to match. meaning that I had a time limit and that I would be able to know if I picked the right color if it were to blend in with the timer. I had to repeat this 10 times for 6 different categories. Hue, saturation, complementary, analogous, triadic, and tetradic. Because of the different categories, I would have to match more than 1 color with some of them, meaning that there would be multiple timers and colors at the center of my screen. The score that I got for the first game was 9.8/10. where I messed 1 up on the triadic part. For the second game I played, I was simply just taught about how color mixing works. where I would start with mixing complementary colors until I’d get to the tertiary colors. After that, I was introduced to the colors black and white to add shade or tint to my colors. Lastly, for the second game, I had to repaint a color that I was shown on my screen using the 14 colors that I was given (including black and white) Which I found to be very hard to the point where I would have to give up and ask for help from the game to complete it. Because of how challenging it was, I was disappointed in myself for not asking for help from the game early because I found it to be quite time-consuming. There was no score for this second game but there's a screen that shows you what you've completed in it and that's what I took a screenshot of. For my third game, I had to sort a list of 40 colors from having the least amount of hue to the most amount of hue in 4 sections with 10 colors in each. I got a perfect score of 0, which is the best score that you can get for some reason. to make it more sensible, I got 40 out of the 40 colors right on it. For my last game, it gave me a list of easy-looking puzzles for me to complete and I decided to click on the hardest-looking one. It was impossible, so I switched to one of the easiest-looking ones and then completed It which still took me a decent amount of time too. What I had to do in the game was sort the colors on a 2D plain using a pattern shown on the website before you would open the puzzle up. Because of this, I kept forgetting what the pattern was and I had to keep going back to check on what it was. It's like trying to complete a puzzle but every time you look at the puzzle box you have to restart the puzzle all over again. Lastly, The pattern was an increase of shade from right to left and an increase in saturation from bottom to top. There was no score for this but since it was a puzzle game, I would have to keep going until I completed it, although it does show me how many moves it took for me to complete the puzzle (26) and how much time it took (29 seconds)(note that it took me multiple attempts to complete this puzzle) Lastly, I believe that this assignment will improve my visual thinking in photoshop and other artistic applications, Because of color theory's great importance in the world of graphic design.
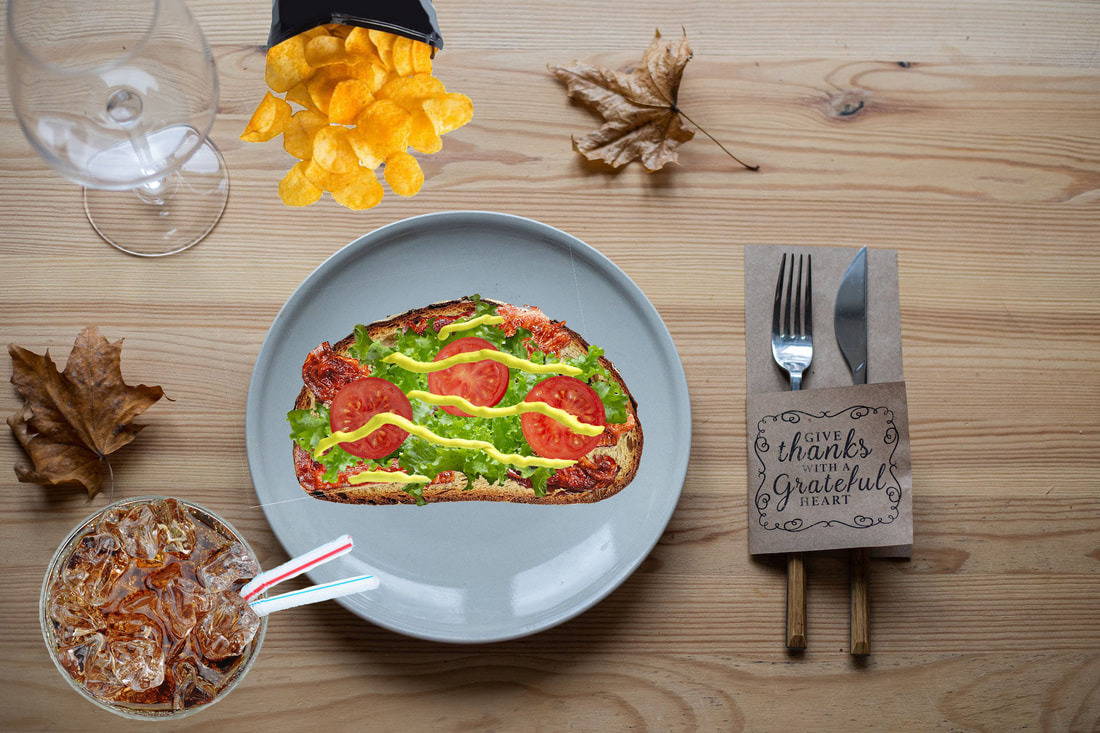 I have learned a lot in my first assignment using Photoshop. Some of the things that I've learned are how layers work, how to insert images, and how to edit and move them. What I did to start this project was I inserted an image of a plate and other things on a wooden table as a background, then started adding food to it. To do this, I started by adding a second layer as an image of bread, resizing it, and then naming the layer of bread so that I would have an easier time finding it when editing my image. After this, I had to remove its white background because of its JPG file format preventing transparency for the white background. What I did for this was use the magic wand tool by clicking on the white part of the bread layer, inverting it by pressing ctrl+shift+i on my keyboard, and then masking it to remove the background. After having been done with my bread, I started working on the condiments by adding an image file of bacon, resizing the bacon, and then using the magic wand tool to remove the bacon that didn't fully fit in the image by removing the image white background then painting them with the color black on the mask part of the layer with the brush tool, from this, I was left with three pieces of bacon with white spots that weren't removed with the background itself. To get rid of these, I did the same thing that I did with my incomplete bacon. On the selected white spots. Even though I had 3 slices of bacon, they were part of the same image meaning that if I were to move one, all of them would move with the moved one. What I did to counter this was I duplicated my image of 3 slices of bacon twice, then removed 2 Slices of bacon from each image so that I would be left with 3 independent images of bacon. Now with these, I duplicated all of them once to get 6 slices of bacon that I would place onto my sandwich. I repeated this process for my lettuce tomatoes, chips, and fountain drink, but I would have two clones of lettuce and 3 different slices of tomato all from one image. To complete my sandwich, I added Mustard to it using the brush tool, then Edited the texture and color of the brush to make it look more like mustard than a standard brush with a hardness of 100.
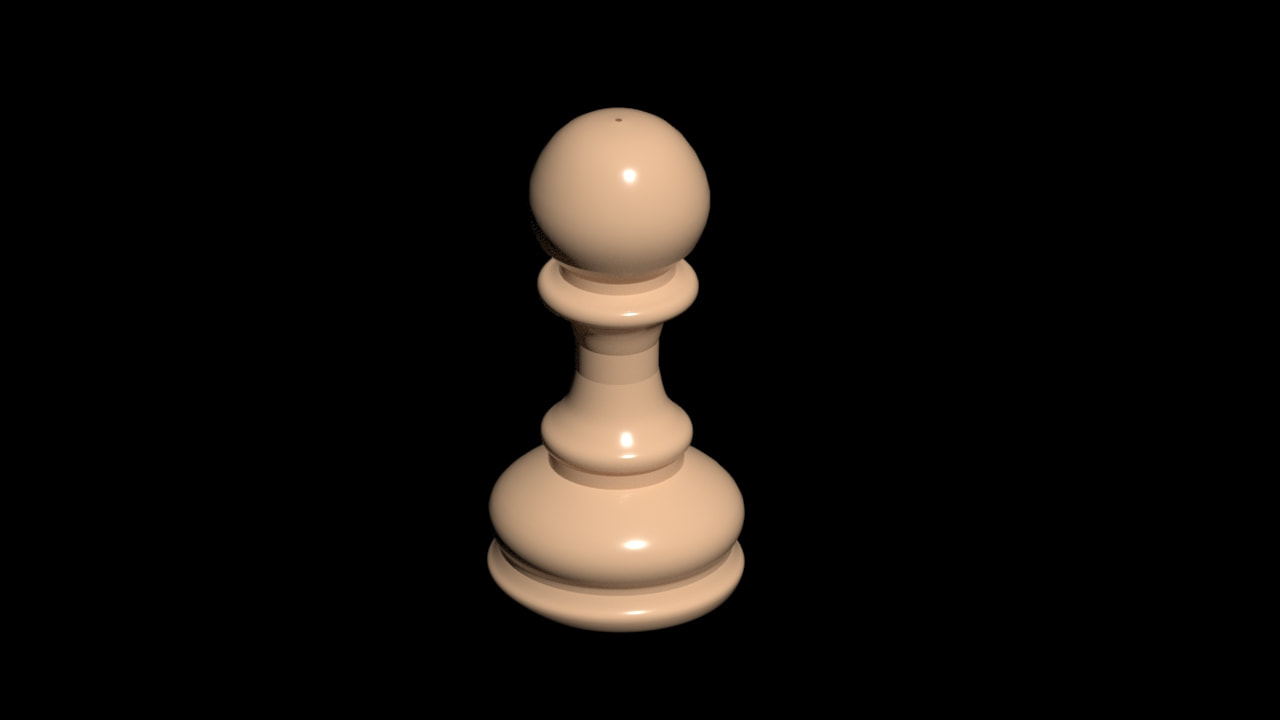
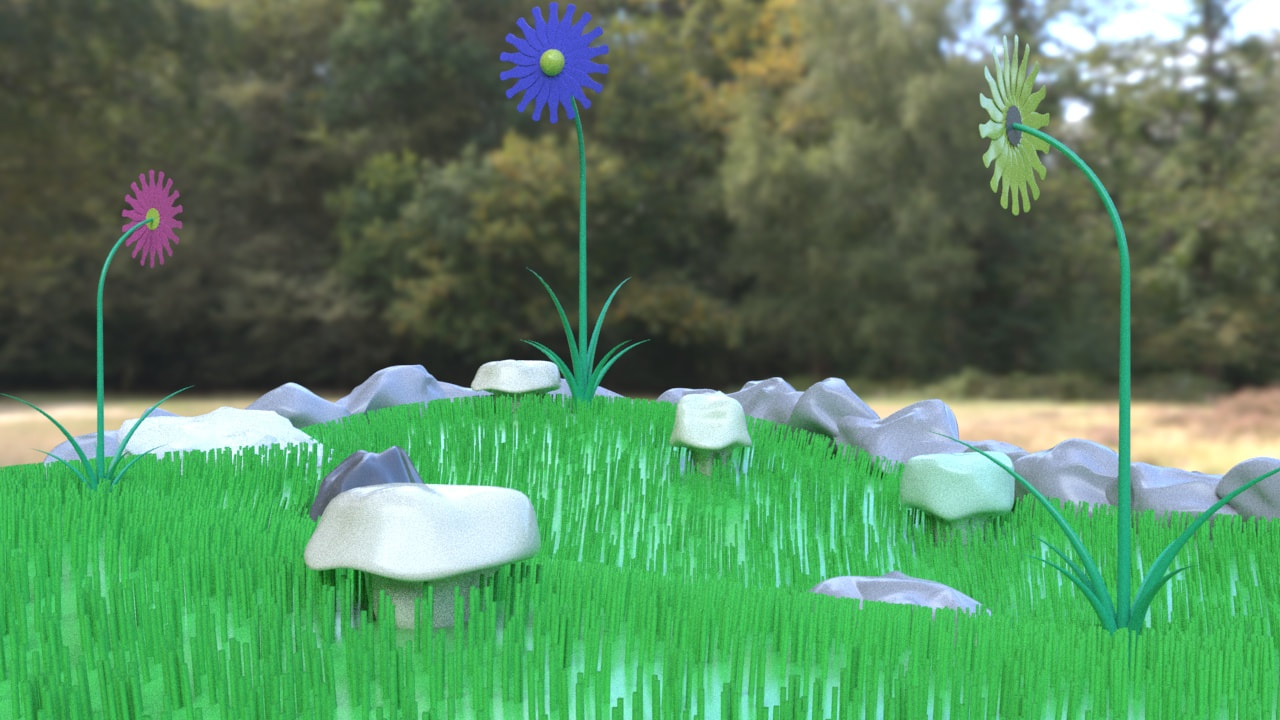
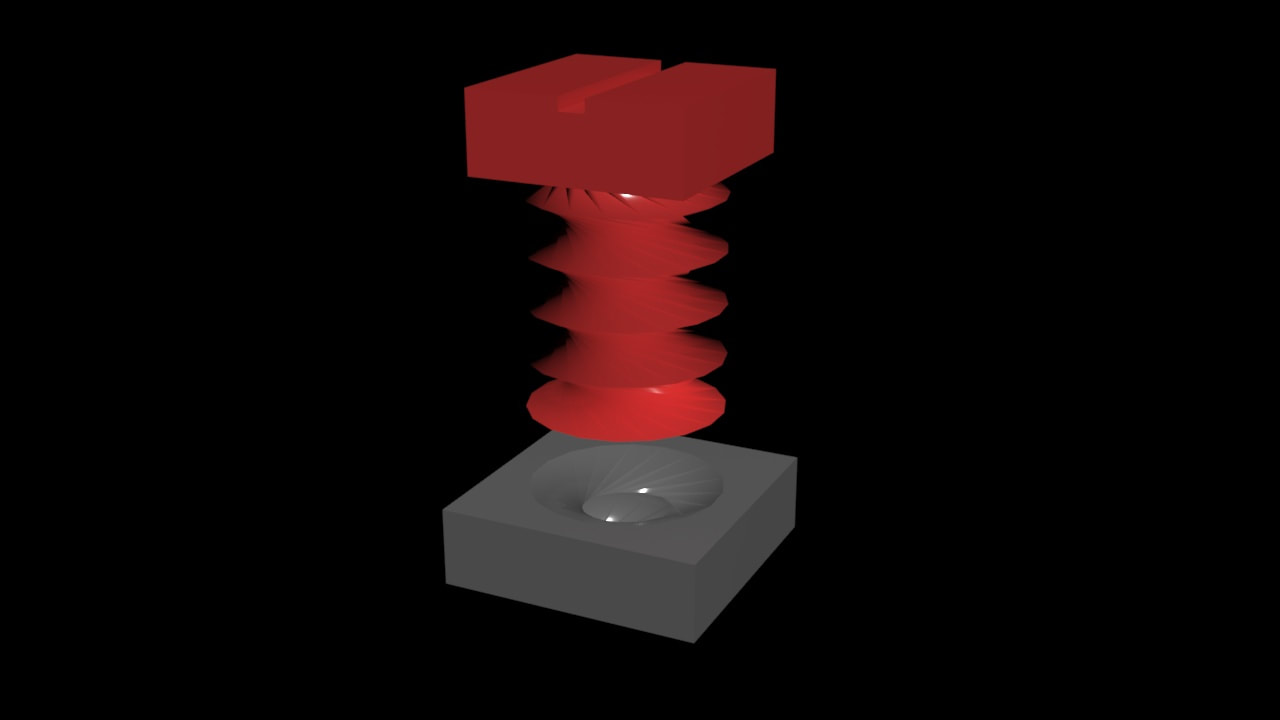
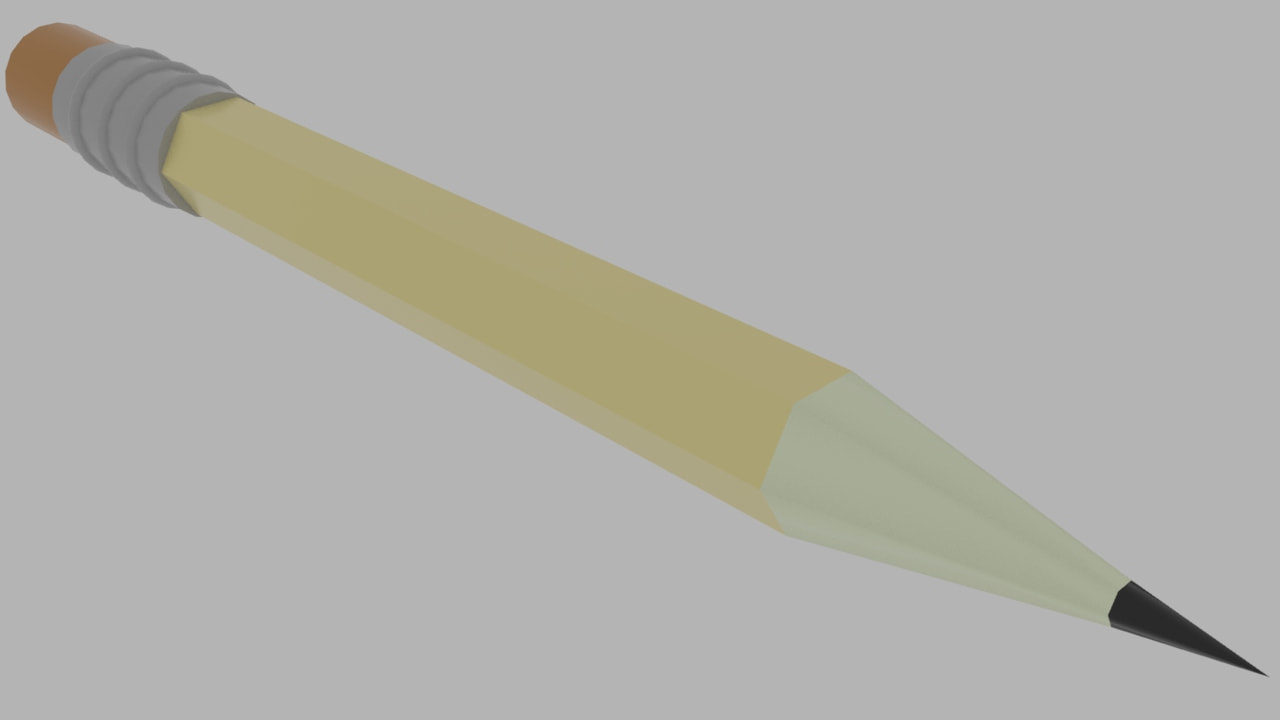
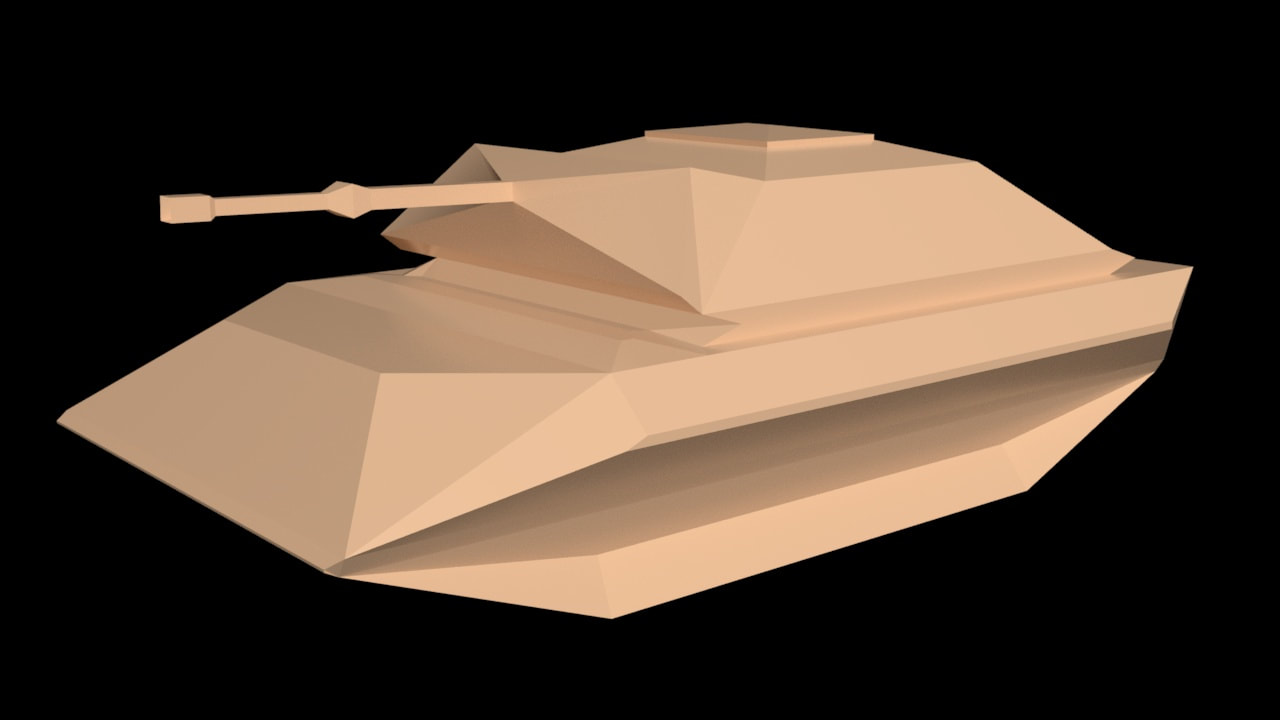
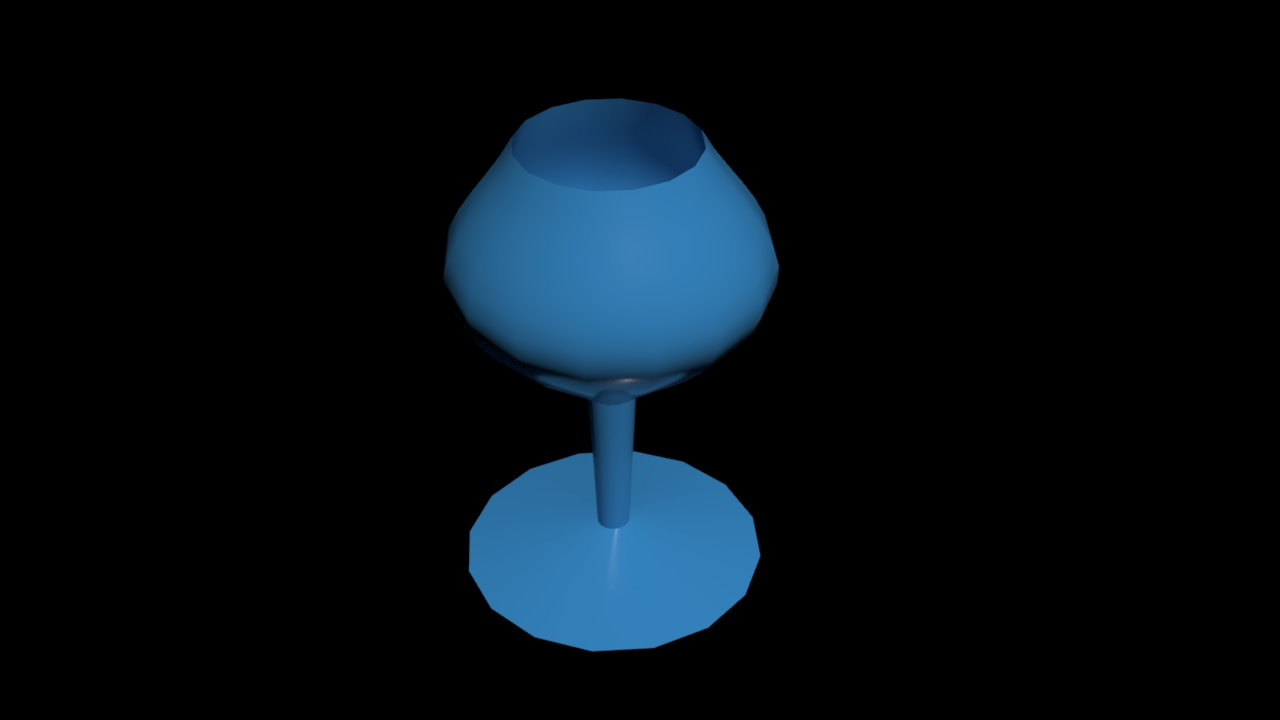
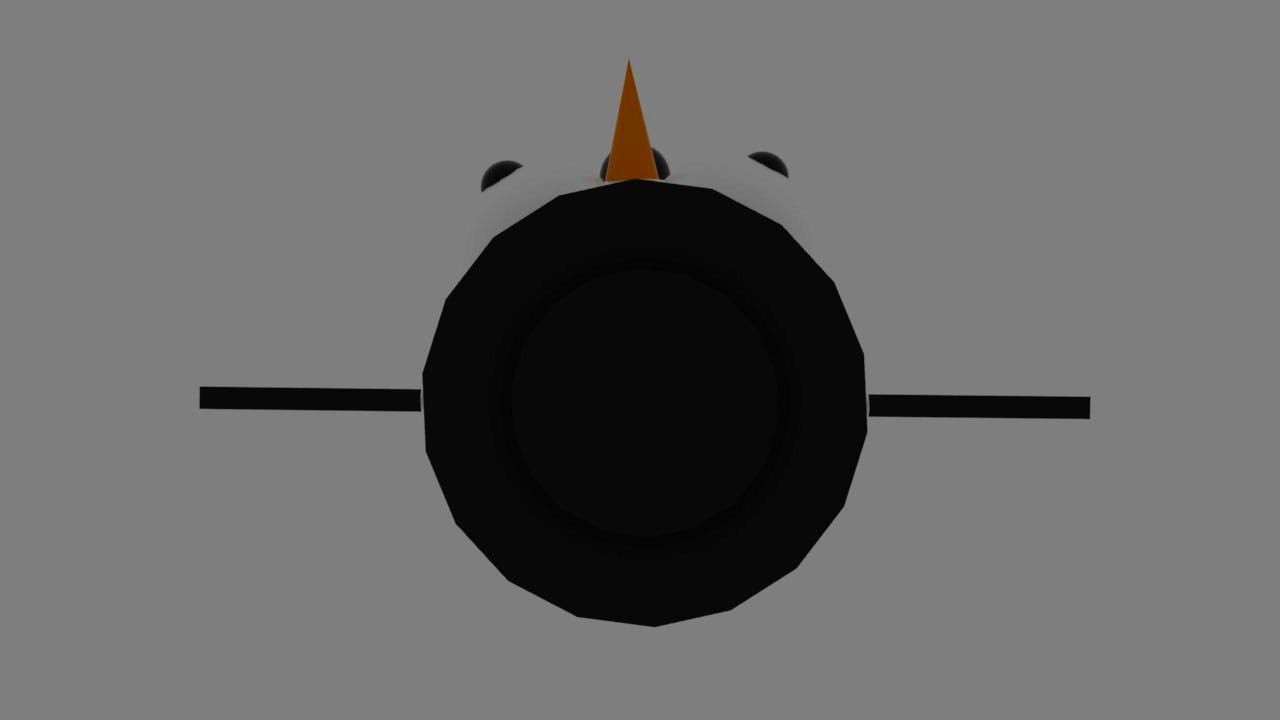
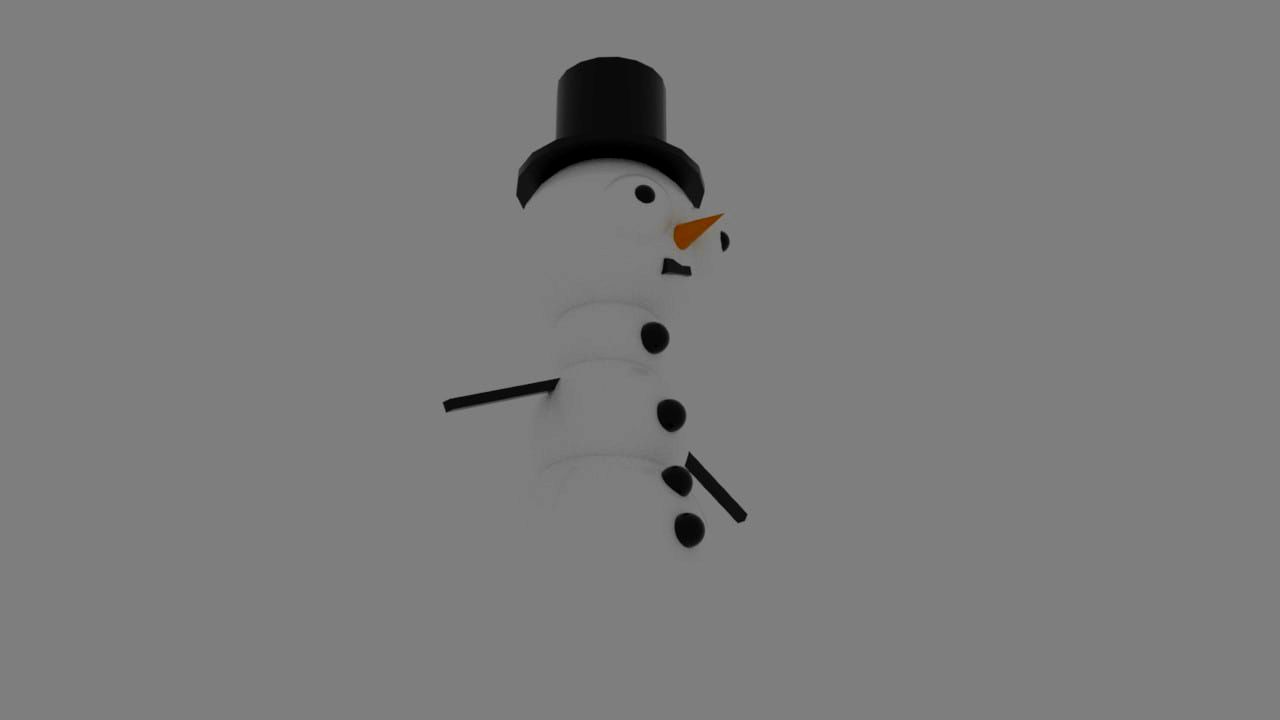
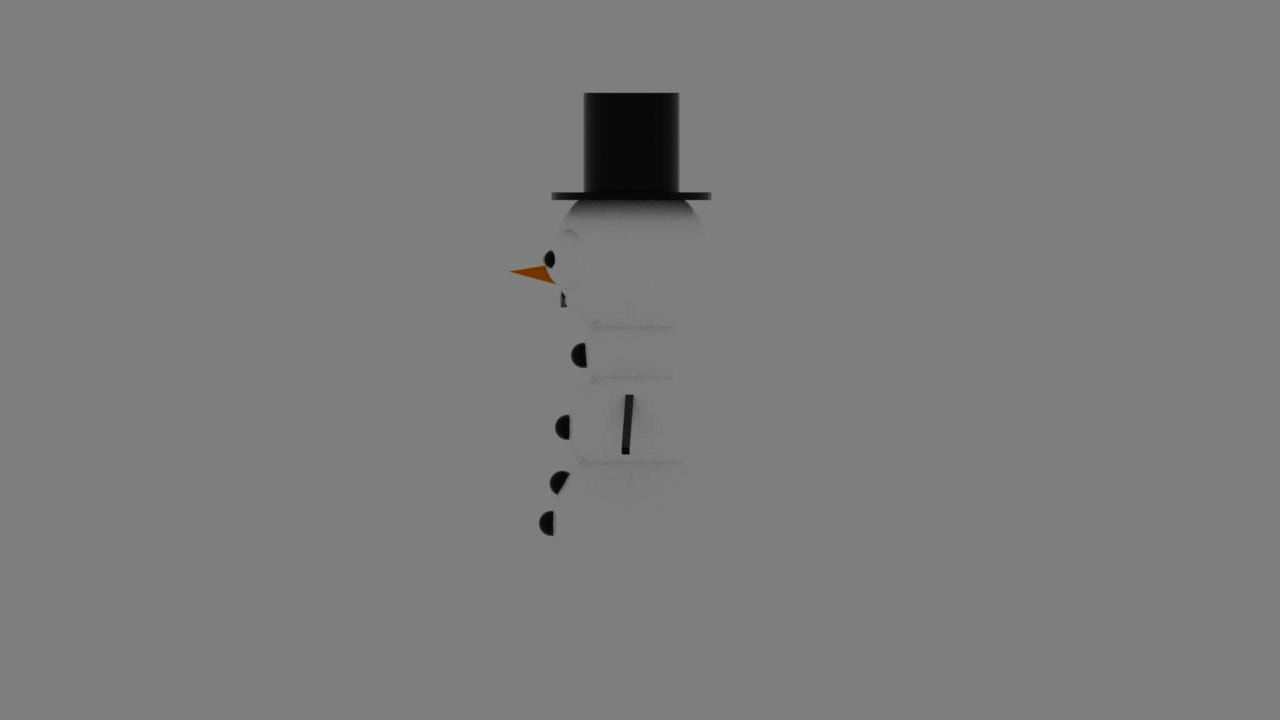
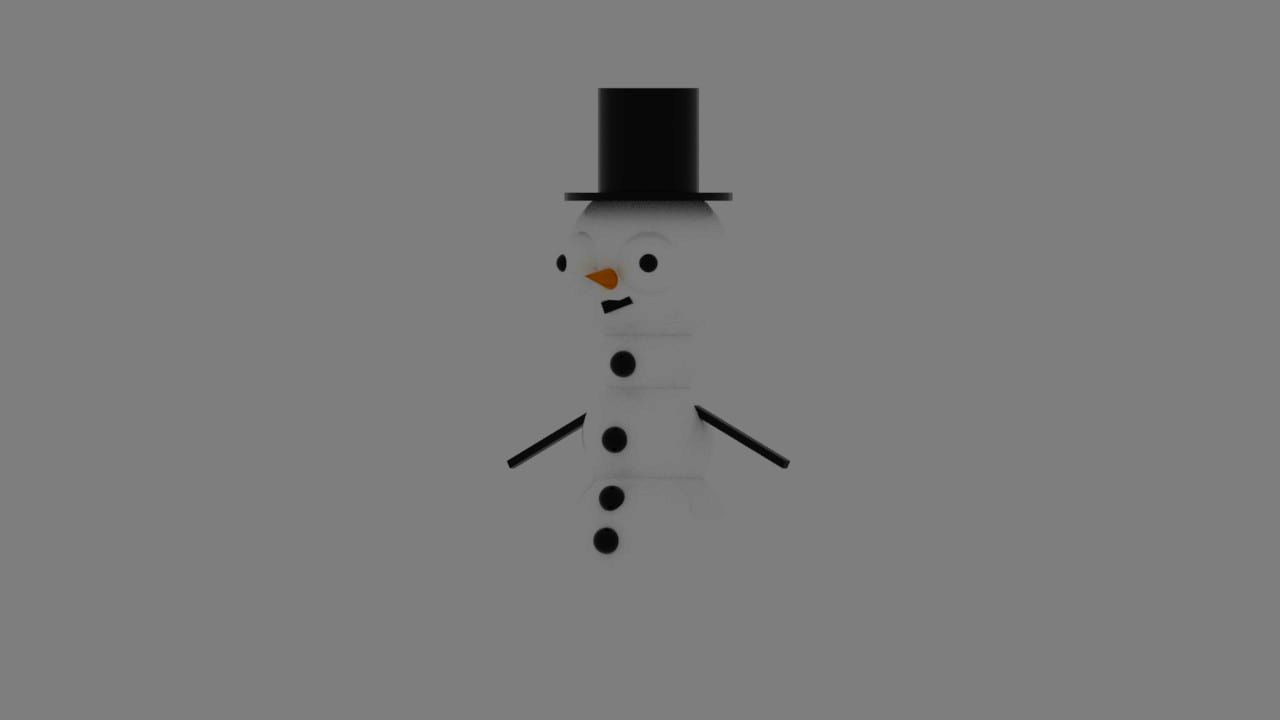
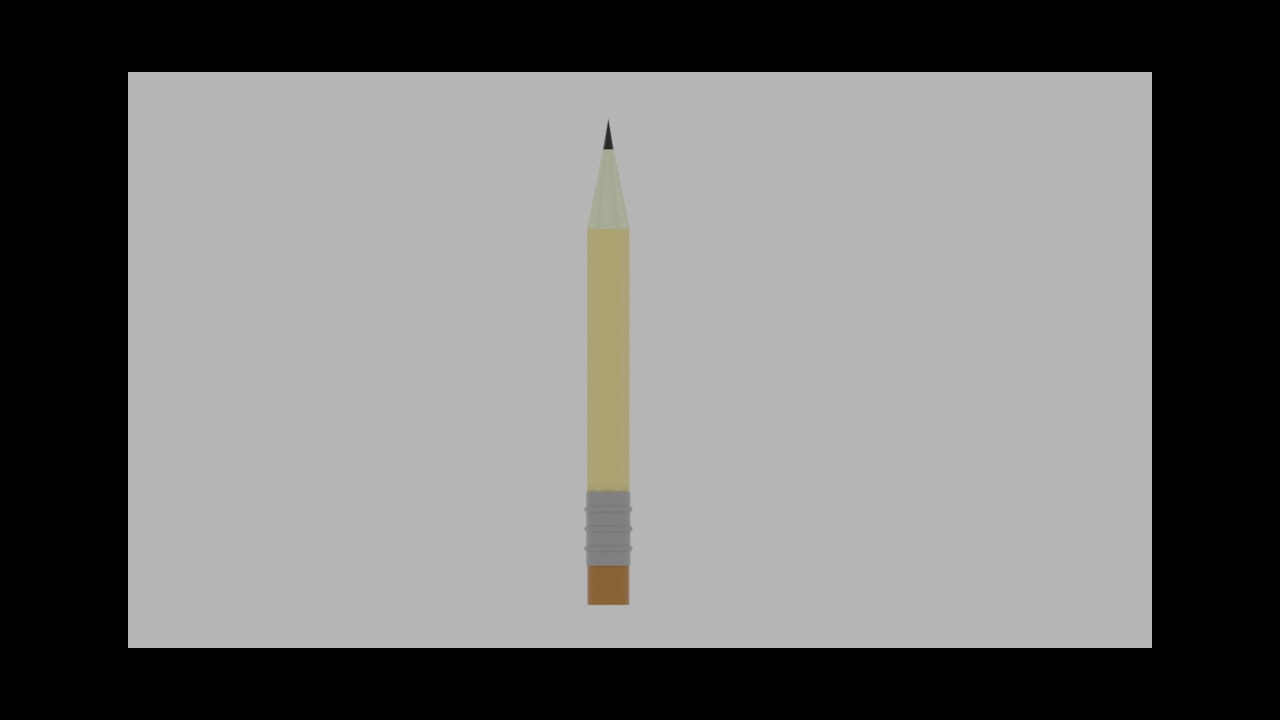
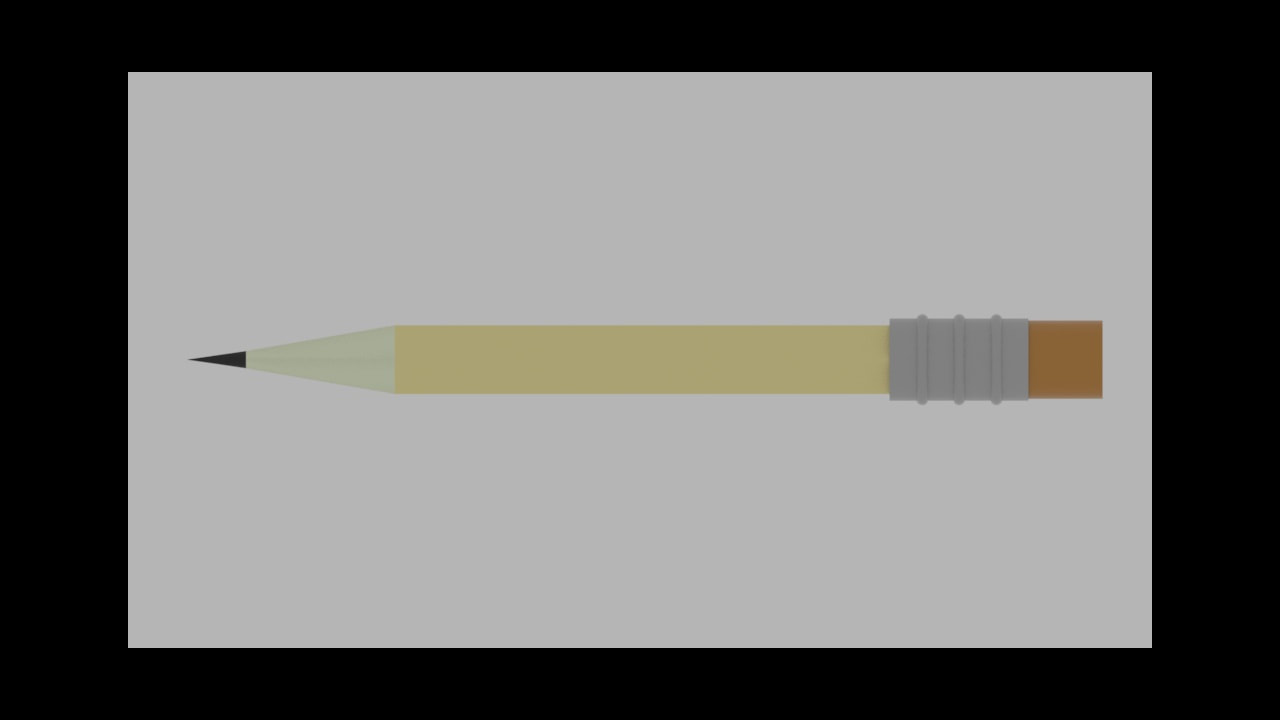
I have learned a lot from the first quarter of the computer modeling and design class that I'm in. What I primarily learned in this quarter is how to 3D model and animate in 3DS max. What I first learned about in 3DS max is the use of standard primitives. In my first project, I was assigned to animate a rolling ball in between 4 buildings, using the box and sphere standard primitives, changing the dimensions and colors of the standard primitives, and then animating the ball. After this, I was assigned to 3D model a snowman and a pencil while also using standard primitives, although this time, the objects we were modeling were made up of multiple standard primitives. The collection of standard primitives needed to be used being a wider selection of boxes, cylinders, cones, and spheres. I also was assigned to use the duplicate tool and change the dimensions of these primitives in more complex ways. Like changing the amount of sides that a 3D object has. After this, I was tasked with a project involving the use of something that I hadn't used before at the time; Modifiers. Using modifiers, I was tasked with the creation of three scenes. A chess pawn, a wine glass, and a nut and bolt. Starting with the nut and bolt, I placed a selection of standard primitives down that would later be modified into my nut and bolt. These standard primitives are cylinders and cuboids. The modifiers that I used were the pro boolean and twist modifiers. After my nut and bolt, I started to work on my pawn and wine glass which were made using the same tools. For both, I started tracing my shapes out with the use of the spline 2D objects, (primarily bezier splines), Then using a modifier to turn my flat objects into 3D ones in a way where the 2D object wraps around itself infinitely around a certain line. After this, I was introduced to the use of editable poly conversions. which is taking a standard primitive and changing its properties in ways that modifiers couldn't do modifiers. What I had to do for each assignment that I was tasked to do was convert a cuboid into a tank and then a spaceship by converting them into editable polys, then changing their properties by editing the location of the vertices, sides, corners, then changing their shapes in many ways such as extruding, beveling, and much more. After being finished with these assignments, I started work on one that introduced the use of landscaping and more modifiers. What I had to do here was create multiple rock, flower, and mushroom models then clone them and place them down into a landscape. With the flower models, I was introduced to the group tool, which groups multiple objects into one, so that you can change the location, color, and dimensions of a group of objects without having to do it to them individually.
I began this project by working on the mushrooms. what I did was follow the tutorial, and then started changing the shapes of the mushrooms. What I first did in this process was I duplicated my mushroom to make four copies of it, then changed things like their color, width, height, thinness, thickness, noise seed, level of noise, and then their level of smoothness. After I created my 5 mushrooms, I started working on my rocks. What I did was place an ellipsoid down, and then I did the same thing that I did to my starting mushroom to my ellipsoid. I created 4 clones, then changed their colors, their width, their height, etc. After this, I started working on my flowers. After following the tutorial, I created 4 clones, then changed the colors of the pedals and then the sizes of my 5 flowers. After having been done with My mushrooms, rocks, and flowers, I started working on where I would be placing all of them. First off, I grouped all of the parts of my flowers, then imported all of my rocks, flowers, and mushrooms into a new plain. After this, I added A cuboid, Made it green, gave it a noise modifier, then smoothed it to add hills. After this, I thought of many ways to add grass to my Hills. What I decided to do was add the hair modifier to it, changing the size of the "hairs", then making them green of course. Lastly, I wondered if something was missing on the edges of these hills. so what is did was I made many clones of one of my rocks, then made the clones surround the hills, then to avoid the surrounding rocks looking lazily placed, I merged all of them, then added a second distortion modifier and smoothing modifier to all of them to give all of them a different look. After this, all I did was duplicate some of my mushrooms and then place everything in their own designated spot to make the landscape look natural. However when I rendered my final product, I noticed its blandness from the background, so what I did was I added an image background found in the 3ds max files that resembled a forest, then I rendered my 3 images. The things that I liked about this project were learning how to use a lot more modifiers and rendering my final product, as I am very satisfied with my final renders. Some of the easiest parts of this project were changing the shapes and sizes of my rocks, flowers, and mushrooms, and creating the hills. Some of the hard parts of this project were trying to figure out how to use the hair modifier for my grass, and adding rocks to the perimeter of my hills, as the computer I was using was very angry at me while I was doing so. The skills that I have gained from this project were improving my ability to pick the right modifier(s) for any given object that I'm editing, and Landscaping in 3ds max. Something that I have learned from this project was learning how to use a lot more modifiers, like the hair modifier, noise modifier, smooth modifier, and a lot more. Another thing that I have learned from this project is how to add an image background to my plan. Which is very useful. I extended my knowledge of 3D modeling from this project by learning how to import things from plains into other plains, and how to turn simple 3D primitives into somewhat complex shapes using a relatively small amount of modifiers. I do think that this lesson was very good, however, I think that this lesson could be improved if it integrated more of what we've learned previously in 3ds max. Which is converting objects into editable polys, and then editing them as editable polys without using modifiers.
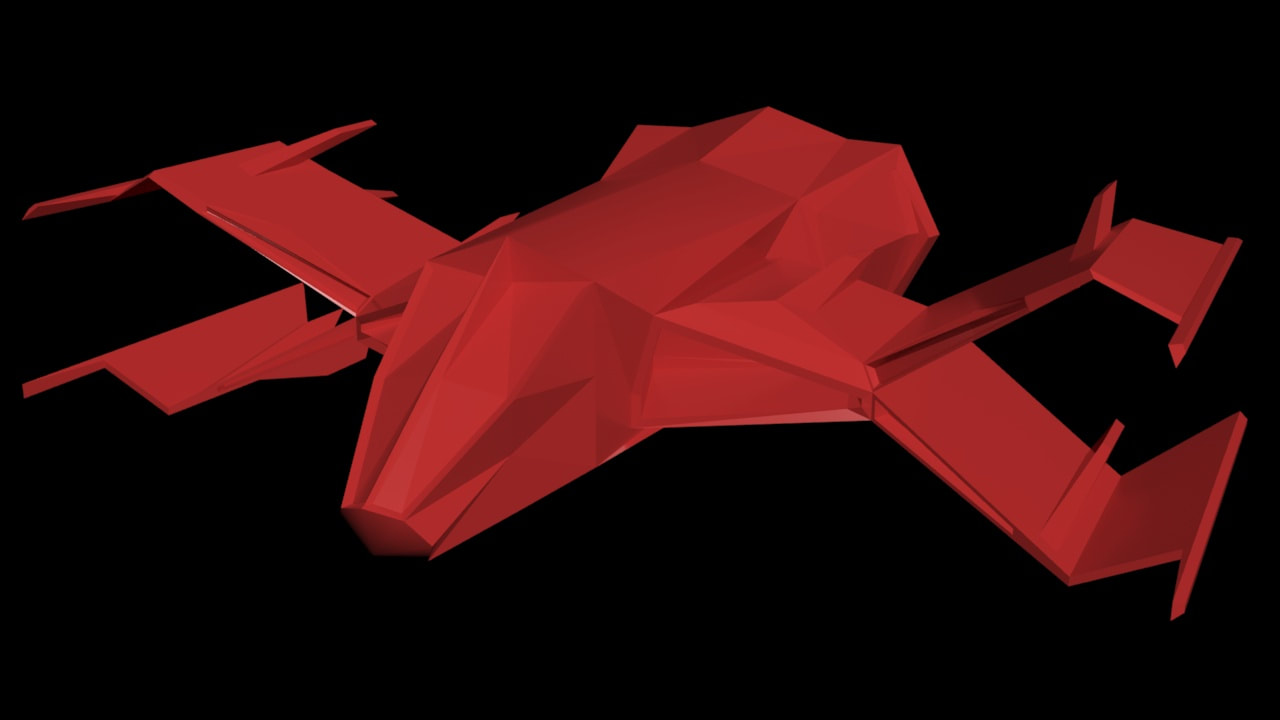
I started this project by changing the shape of the wings. I did this by extruding a polygon at an angle on one of the wings and then changing its dimensions so that it would match the wing below. the tool I used to do this was the chamfer tool, which I used to add and then shrink 2 new polygons that I would then extrude and then bevel as a way to add flaps to the top wings of the spaceship. I still felt like there were a few things that were missing on the wings, what I decided to add to them was a rear booster to add more detail to the back view of the spaceship. I did this by using the chamfer tool to add and then shrink a polygon of the same geometry, then using the extrude tool and bevel tool to subtract the part of the wings that the polygon was covering. After this, I decided to do one more thing to the wings. What I did here was I wanted to add blasters to 4 of the outer wings. what I did was I selected the spaceship's wings' outermost polygon, then beveled it twice to give it the shape of a hexagon, after this, I just lengthened the hexagon by using the extrude tool with a lock on it. After this, I noticed that the top was lacking a bit so I heightened the altitude of the centermost line of the spaceship to give the center of the spaceship a more detailed look, after this, I decided to add more to the back of the spaceship, more boosters! What did for this was I selected the sides of the already existing boosters on the back of the ship, turning the lock tool on to avoid distortion in any bordering polygons, then extruded to lay the foundation for my new two boosters. what I did for this was I used the same process that I did with the rear boosters on the wings. Chamfer tool to shrink the polygon, then extrude and bevel to hollow out the chamfered polygon. Some of the things that I liked about this project were using the symmetry tool for the first time, and modeling something that I found very fun to model, A spaceship! Some of the easiest parts of this project were rending the images and eventually putting them into the Weebly blog editor (as I am very used to doing so now) and using the extrude, chamfer, and bevel. which are three tools that I have mastered using at this point. (excluding any implications other than polygons on an editable poly). One of how I can use this lesson in the real world would probably be for aircraft design, the reason why I say this is because while spaceships are certainly not airplanes/jets, some of the design features I added to my spaceship are design found on jets/airplanes. Such as flaps, which are found on the wings of my spaceship. The skills and knowledge I learned to produce this product were how to use the symmetry tool and mastering the chamfer tool. I extended my knowledge of 3D modeling after completing this activity by learning how to shape things better, adding symmetry to my models, and becoming much more efficient when it comes to modeling using editable polys. Something that would make this lesson better would be if it were to include to use of more tools, as the only tools we've currently been using so far for editable polys are the extrude, chamfer, and bevel tools.
I began this project of extending the detail of my tank model by changing the angle that the turret is at, because of its unrealism. I did this by removing the turret and changing the angle of the polygon that the turret previously was on. I did this by using the polygon menu for the editable poly and the select and rotate tool to rotate the polygon that the turret was on to an appropriate degree. However, this caused the bordering polygons to distort. meaning that I had to find a solution to that problem. What I did was I removed the distorted polygons, set the editable poly menu to the border, clicked on the voided polygons, and then clicked cap on both of them. Lastly, I switched back to the polygon and extruded the polygon that the old turret was on, however, I noticed the unrealistic shape of the turret. It was much too thick, and it lacked detail. so, what I did to change this was using the select and uniform scale tool to change the shape of the polygon and extrude it to create an appropriately sized turret. However, I still noticed that the turret was lacking detail, so what I did was I shortened it and then added different-sized and shaped sections using the bevel and extrude tool for more realism. Also, to add a touch, I made a slight indent in the tip of the turret to give the illusion that it has a hole in it. After polishing the turret, I decided to start working on the front of the tank. What I did was add an extra pair of polygons connected to two front polygons using the select and uniform scale tool. This gives the front of the tank a much more realistic look. After this, I especially noticed that the sides of the tank were lacking detail. So, what I did here was I used the bevel tool to extrude and bevel on the top part of the sides of the tank. and then intruded and beveled on the bottom part of the sides of the tank. The reason why I did it was not only for added detail but also to give the illusion of the part of the tank where the wheels go. After all of this, I noticed that the top of the tank was lacking a bit. so, what I did was I used the bevel tool, then the extrude tool, then the bevel tool again, to make the tank look like it has a cover on the top of it where tank operators go inside. Lastly, I changed up the geometry of the parts below the rotating part of the tank to add more detail. Lastly, I wanted to add a bit of detail to the back of the tank to make the whole thing look complete. What I did was I switched to edge in the editable poly menu, and I selected that part of the tank in the front viewport (showing the side of the tank) and moved it using the move tool. This was a very fun project to work on, and I found its challenge of having to turn a single box into a tank to be very fun. Some of the other things that I found very fun about this project were organizing all of the images using a slideshow element and using the tools used for editable polys. Some of the easy parts of the project were using the editable poly tools, rendering the images, and putting everything together in Weebly. Some of the hard parts of this project were Figuring out how to use the cap tool for the editable poly to avoid distortion, figuring out how to change the angle that polygons are at, and trying to figure out how to select multiple polygons on the editable poly at once. I can use this lesson in the real world for other software applications that specialize in 3D modeling. This would be helpful in 3DS max and other applications because of the optimality of designing a 3D model using only 1 shape, as it might reduce the processing power needed in order to render/animate a 3D design. The skills that I learned to produce this project were skills obtained from creating a tank from a square by shaping it as an editable poly, as there are a lot of skills to gain from learning how to shape objects in 3ds max as editable polys. these skills/techniques include Learning the difference between each of the geometry options from the editable poly menu, such as Vertex, Polygon, and more. some other techniques to be learned from this include extruding, beveling, inserting vertexes, and so much more. I extended my knowledge of 3D modeling after completing this activity by learning the pros and cons of converting a shape to an editable poly. Because of this, My skill and knowledge of 3dx max have been vastly improved. Now this lesson was great and all, but certainly not perfect. there could've been some things to improve our learning experience from it. These include whether this lesson's tutorial video gave a more in-depth analysis of the tools that can be used in the editable poly method. The reason why I say this is because the tutorial gave a very shallow analysis of the tools that can be used in the editable poly method, and also only really went over the polygon tools.
This project has taught me much about 3ds max, especially how to use more primitives like the torus and cone. It also gave me a better understanding of how duplication works. Although the primitives in 3ds max have very simple shapes, they can be used to form much more complex shapes when combined. this is because of the amount things that you can do to any given primitive, these consist of duplicating the primitive, changing the number of sides it has, moving it, removing a part of the primitive, changing its radius(es) (if there is an option for that), and so much more.
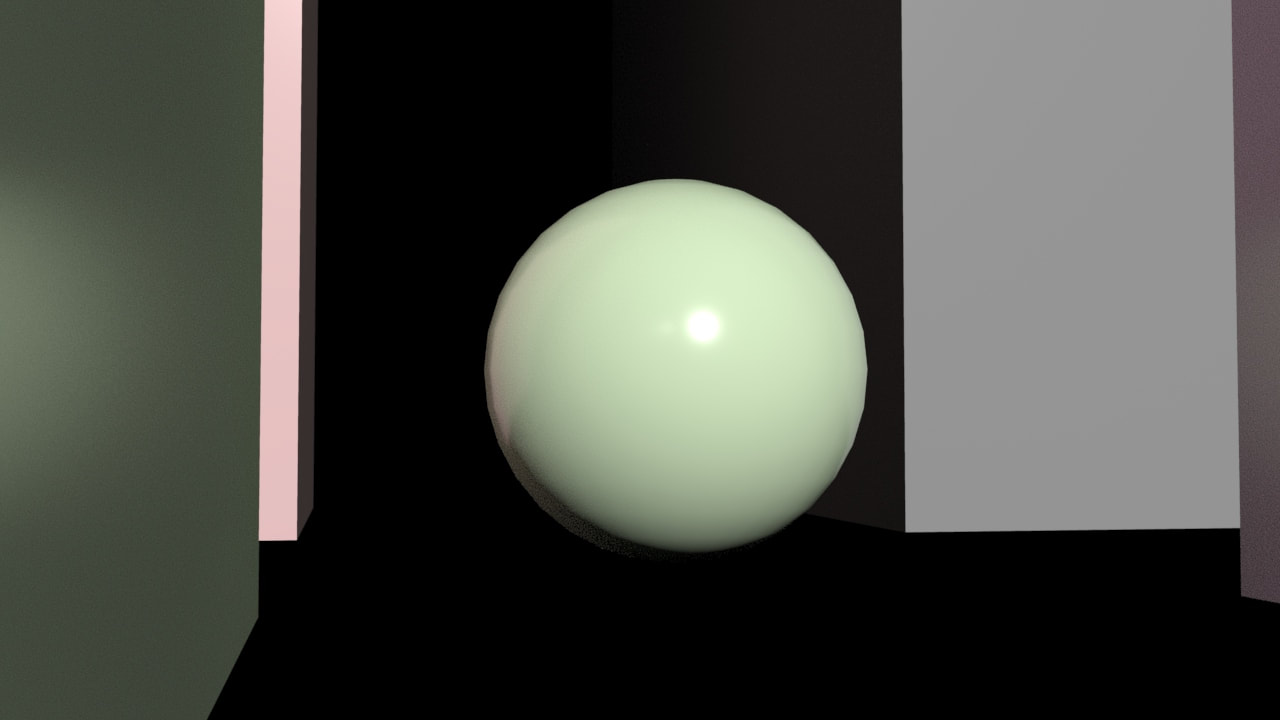
I started working on this project on September 6th, 2023. Some of the things that I like about this project include animating the ball, Experimenting using different tools, and coming up with solutions to challenging problems. Even though there were many things that I liked about it, there were some that were quite annoying and difficult to complete. These things include trying to place the ball at its starting point (as I spent a while trying to figure out where to place the ball by manually changing its coordinates and also how to move the ball accurately by using the move tool), trying to get the video onto Weebly, as I ran into some problems there. (such as trying to figure out what tool in the blog editor to use to put in my video. At first, I tried to use an HD video but figured out that I would need a subscription in order to do so, then then When I figured out how to add it using the mp4 file's HTML code embedded in Google Drive, it took me some time to realize that the link to the video on google drive was privated and that it needed not to be. While this project has some hard parts, it also has its easy bits. Some examples include animating the ball (because 3ds max automatically puts in a set velocity for you when you make the ball go from point a to point b in n seconds. This makes it super easy for beginners to animate things in 3ds max), Adding in the shapes (because there is a large variety of tools that you can use to do things like duplicate shapes in different ways, change their dimension, their coordinates, shape, and a lot more.), and moving around in the editor. (like adding in the shapes, there is a large variety of usable tools for this. The reset view tool is a prime example that I use a lot.) The ways in which I or anybody can use what I have learned from this in the real world include 3D modeling, Animation, Architecture, graphic design, and so much more. It's safe to say that I have learned a lot from this project. Some examples of the skills and knowledge that I have learned to produce this project include an increased understanding on how to create blog posts on Weebly, and a good understanding of the basics of 3ds max, which include rendering an image and a video, animating, camera control, and many other tools found in 3ds max. While this project has taught me a lot, there may have been some things done to make the lesson for the project better. Personally, I would recommend adding a larger variety of tools needed to complete this project, as the tools we've used for this are very base level to the point where there could've been changes done to the criteria of the project to better our understanding of some more obscure and useful tools.
|
AuthorHey there! My name is Ivan Kacvinsky. I am currently taking a Computer modeling and animation course. What I have learned how to do so far in this class is the use of 3DS max. a 3D modeling software that you can render, 3D model and animate in. All of the three things listed are things that I have been taught how to do and have done. Important: The views and opinions expressed in this blog are solely those of the author and do not represent those of Chapel Hill HS Or Chapel Hill-Carrboro City Schools.
Archives
April 2024
Categories |


 RSS Feed
